Stories posted under Pinkbike Community blogs are not edited, vetted, or approved by the Pinkbike editorial team. These are stories from Pinkbike users.
If a blog post is offensive or violates the Terms of Services, please report the blog to Community moderators.
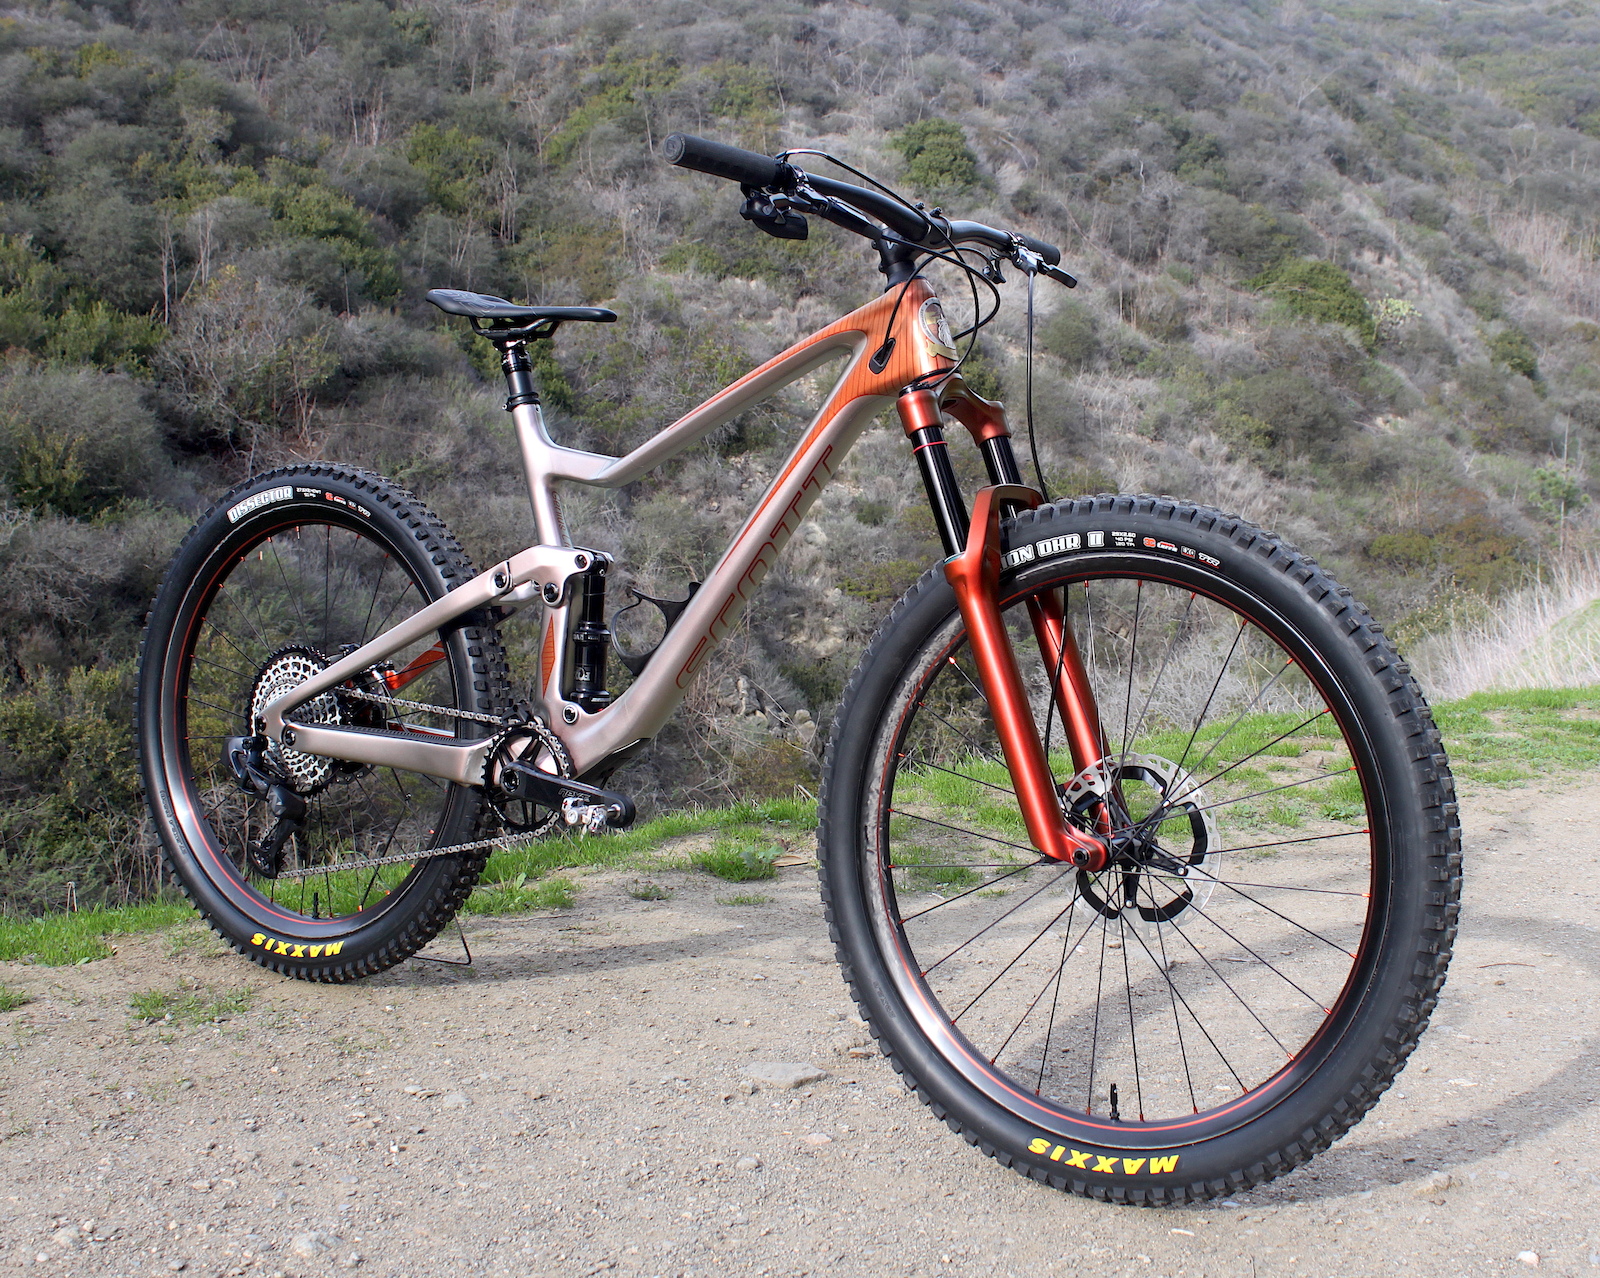
Creating a Super Capable, Category Blurring 25lb Scott Genius Mullet Masterpiece
It all started out innocently enough...
With a simple question: What's my next bike build gonna be?
(Things went a bit sideways from there...)
Having practiced extreme delayed gratification for going on 6 years - flogging a 2014 S-Works Enduro (the final 26" version - by choice!), it was time to ponder and decide what the next ride was going to be.
Don't get me wrong, that Enduro had been a best-of-everything dream build in its own right, at least back when it was built, and it was like my adult BMX bike, with 165mm of ridiculous/bottomless travel, allowing me to ride like a total hooligan, and stay alive.
That bike had been around the world and allowed me to experience some of the most primo trails the planet has to offer.
But with 26" wheels, 2x11 drivetrain, and shock shaft and stanchions beginning to wear through the black anodized coating, it was time to put her out to pasture.
But what direction to go?
There are worse problems to have than building a new bike during this golden age of mountain biking. Supply chain issues and high prices aside.
I could take the easy route and build one of the modern do-it-all wonder bikes on everyone's short list. I was SO tempted to just pull the trigger on an Ibis Ripmo and call it done.
But having been riding - and geeking out on all things MTB - at such a high level for decades, I felt like it was time for something really special. Something one-of-a-kind that blurred the lines and pushed limits, AND looked super sexy too.
Though maybe not Dangerholm levels of exotic or esoteric.
This new ride had to be something that was perfectly suited for my local trails, but also at home and capable regardless of where the airplane happens to drop me or who I'm riding with.
And with potentially 7lbs (3.18kg) on the table... 7lbs less bike (vs other "reasonable" weight bikes I could be traveling with) equals 7lbs more riding gear and supplies for a big trip. This would make saving weight a high priority.
Also having really gelled with Horst-Link bikes in the past (and just getting off one), that was the likely direction.
Down the rabbit hole we go...

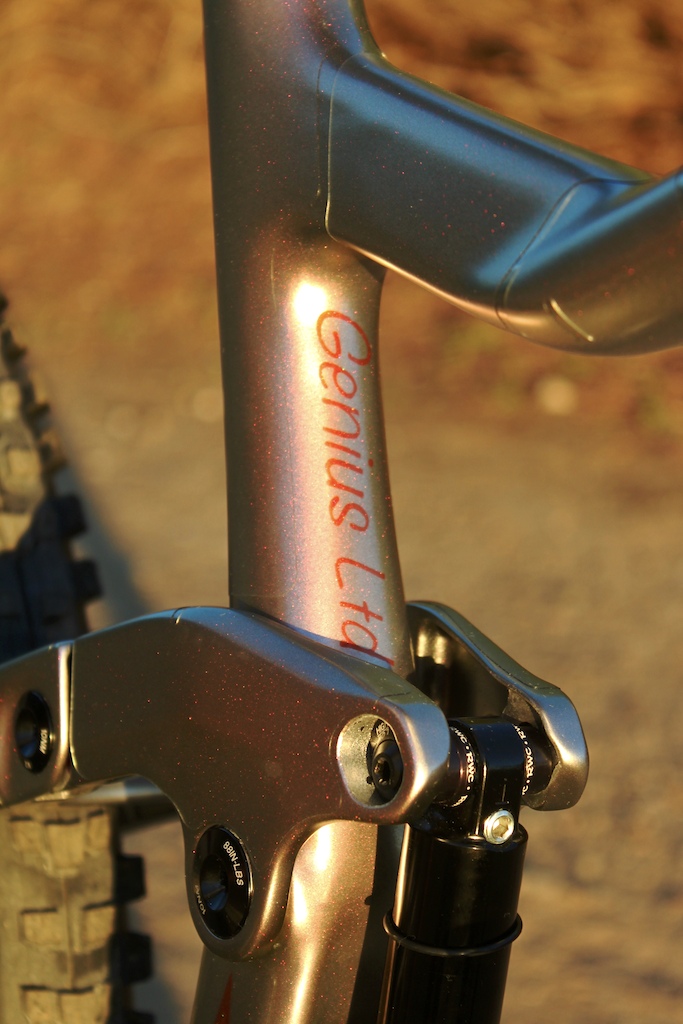
A 100% hand-crafted custom head badge by brilliant artist Jen Green. Check out @jengreenheadbadges on Instagram. Made from copper, brass, nickel and Sterling silver. Those are my 3 mountain biking hometowns on this planet. Also a first attempt at airbrushing blue sky.
But why a (last generation) Scott Genius you may ask?
I realize the Genius - and Scott bikes in general - can be polarizing.
The past month has proven this, with the release of the next-generation Genius. And the (ahem...) spirited debate that followed.
That bike was released just as I was thinking about writing this story, and my initial reaction was "Oh $#!^... I guess this build is no longer relevant..."
But then it occurred to me that this build may have just became MORE relevant. At the very least, we can reminisce (or commiserate) about the good old days of non-integration, mullet-ready-ness and non-invisible shocks.
Also funny that I had been half-jokingly calling this my "Super-Trail"™ bike.
Yes, Scott bikes can be a bit quirky. They're also not the biggest or most visible company, so they're a bit off the radar.
But, one thing you can also say about Scott is that they (at least the higher end bikes) generally have very refined carbon layups are nearly always the lightest in each category without being fragile (this, and the Ransom Tuned being great examples). Although the latest generation Genius has lost some of this, mostly based upon the sheer amount of carbon real estate needed to surround and cover up all of the rear suspension components.
At 2450g for this frame with a regular Fox DPS shock (vs the stock DPS-based Fox Nude Twin Lock), puts this among the lightest capable 150mm frames made today. Which make it a great starting point for this build.
Also a plus that you can run any standard 185x55 trunnion mount shock, and the 26% linkage progression feels right for aggressive riding, and also makes a coil shock do-able if you were so inclined.
Before the final build I shipped both the standard DPS and the stock Nude/DPS off to the wizards at Avalanche Downhill for all of their internal tricks including SSD (speed sensitive damping) and HSB (high speed blow-off), and they valved/tuned them perfectly to my weight and riding style. They believe the DPS with their modifications may well be among the best performing air shocks available. And I would now have to agree. Quite a revelation on the trail! Super plush yet controlled in all conditions.
I'm regularly using all of the travel, but have never felt it bottom out.
In order to really make the shock work at warp speeds under real trail conditions, they need to get rid of the lockout functionality (lockout = plugged orifices and restricted flow), which is a worthy tradeoff for the unreal performance you get on the downhills and in the rough.
So now on the regular DPS the "climb switch" gives you about a 10% compression damping adjustment range (all usable), and a similar effect on the rebound dial with only the slowest few clicks not being useful for actual trail riding, but great to quiet down the rear end during the road ride to the trailhead. Though the damping adjustment range may seem narrow, the damping rates are so spot on that I never needed more adjustment one way or the other.
The first version of the dream build featured the Fox DPS. This was a big help in keeping the bike's weight down. Currently I'm running the Fox Nude (internally it's a DPS) with all of the same Avalanche tricks, only featuring the Nude/Twin-Lock air chamber closing mechanism and "Ramp Switch", which also closes off another air chamber.
It is a bit heavier, but It's like being able to install 1-3 volume spacers on the fly (between the ramp switch and the handlebar lever), effectively shortening the travel and raising the BB for steep climbs. Unlike a normal lockout, this gives the bike a lively climbing personality while maintaining a supple, sensitive initial travel for amazing traction.
Many people get hung up on the Twin-Lock system (often without ever having ridden it), not realizing how easy that is to fix, which in my case meant keeping what was good, and ditching the proprietary Twin-Lock system that links the front and rear suspension together.
But I didn't discard the front lockout entirely. It's actually quite nice to have on tap for that road stomp up to the trailhead at the start of every local ride.
The solution: I separated the front and rear into what I call Multi-Lock with these tidy, super-minimalist DT Swiss Double Shot lockout levers from the old days (~2011 or so). They're quite unobtainium these days, and I was able to track a few of them down in Poland (DT4You, the Polish DT Swiss distributor if you want to try them).

One man's bird's nest... is another man's non-issue. And how about that 205g bar/stem combo (that's enduro-rated)? The 20mm rise / 9° sweep bars pictured have now been swapped for 15mm rise / 6° sweep, with a 50mm 17° version of the same stem. The bar/stem combo is now 198g. That trick little Problem Solvers clamp under the stem keeps the headset tension dialed in when removing the stem and bars for traveling.
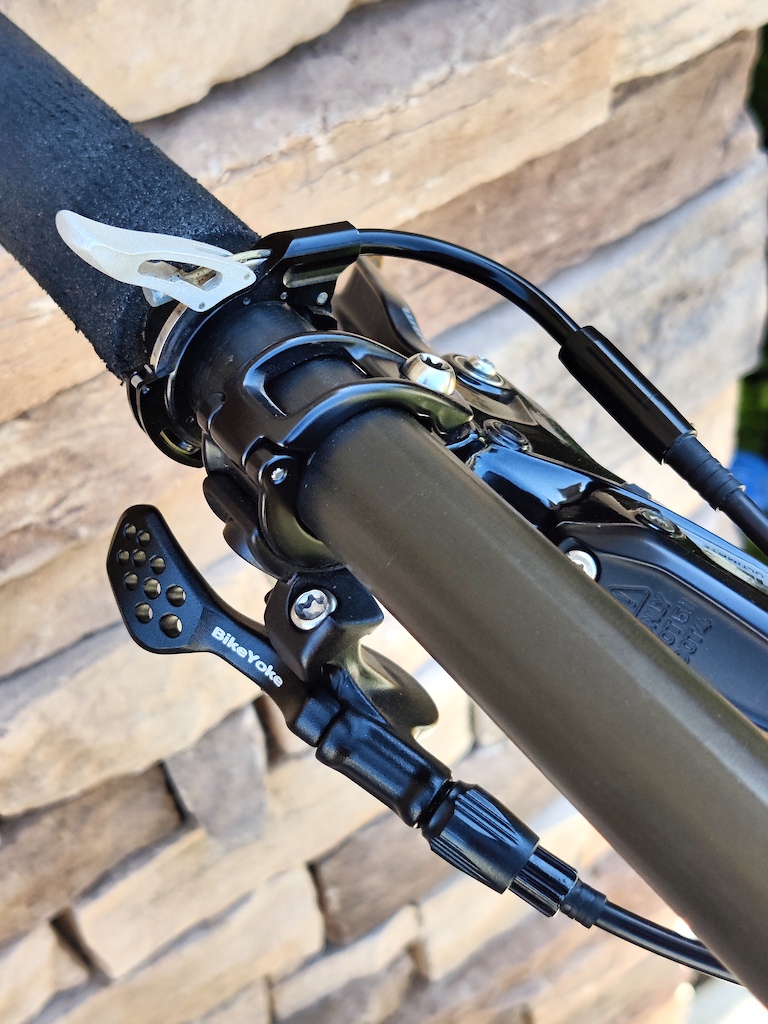
Super tidy and minimalist Swiss and German engineering.
Isn't this Genius frame getting a bit dated and long in the tooth?
I can hear you in the comments now:
That seat angle is SO 2014!
I can't run a 240mm dropper post!
If a rear suspension is designed correctly, it wouldn't need a lockout!
Look at that fooking rat's nest of cables!
Etc, etc...
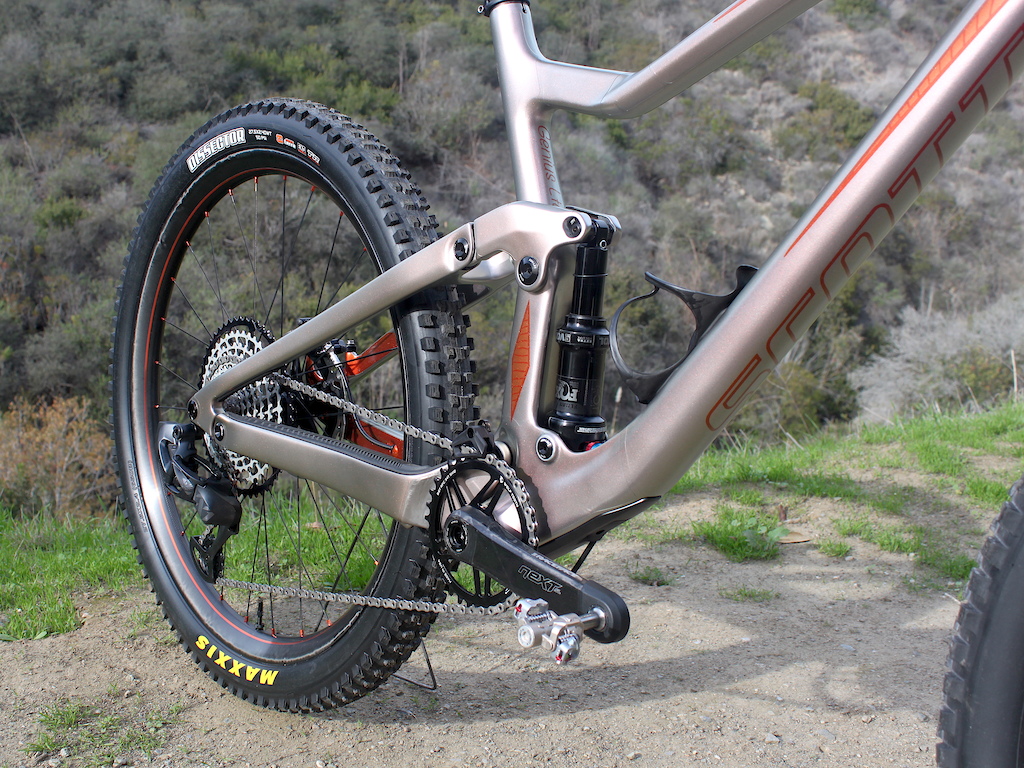
Yes, you can find something more station wagon long, chopper slack or pedal dragging low, but with the longer 160mm fork and slightly more BB drop by flipping the chip (to the "high" position to almost compensate for smaller wheel diameter) and running 27.5" in the rear, this configuration strikes a great balance for all-around riding.
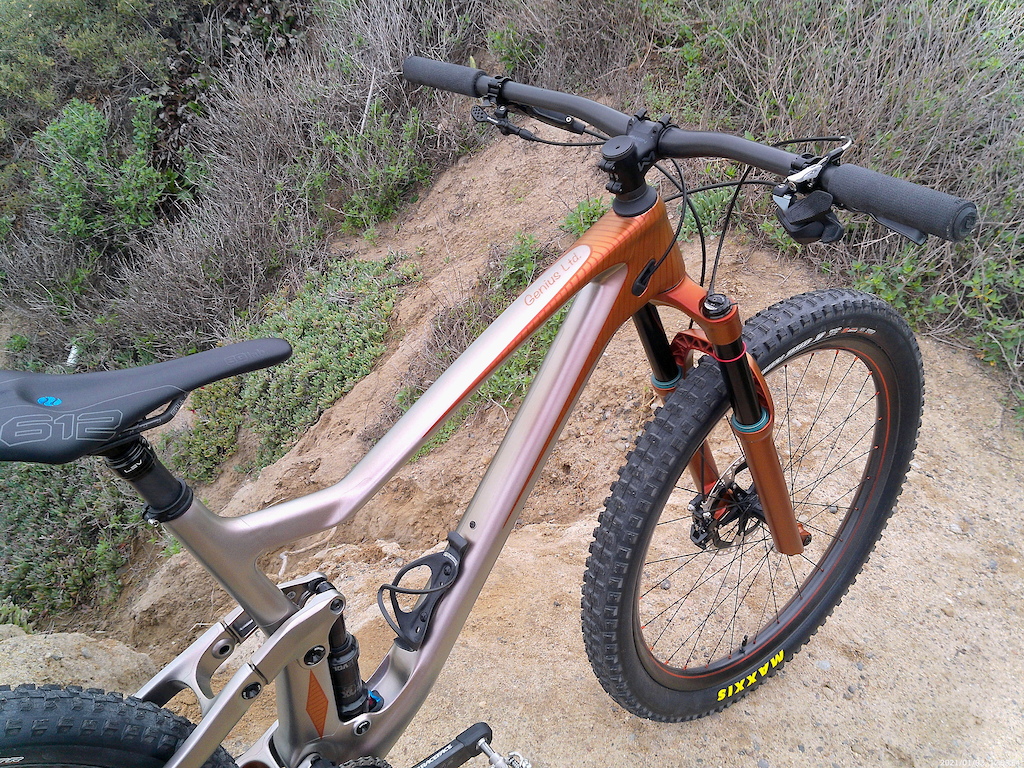
Sliding the seat forward on the rails gives an effective (literally and figuratively) seat angle of around 76° and a great pedaling position. There's more angle available if you wanted to max out the seat rails.
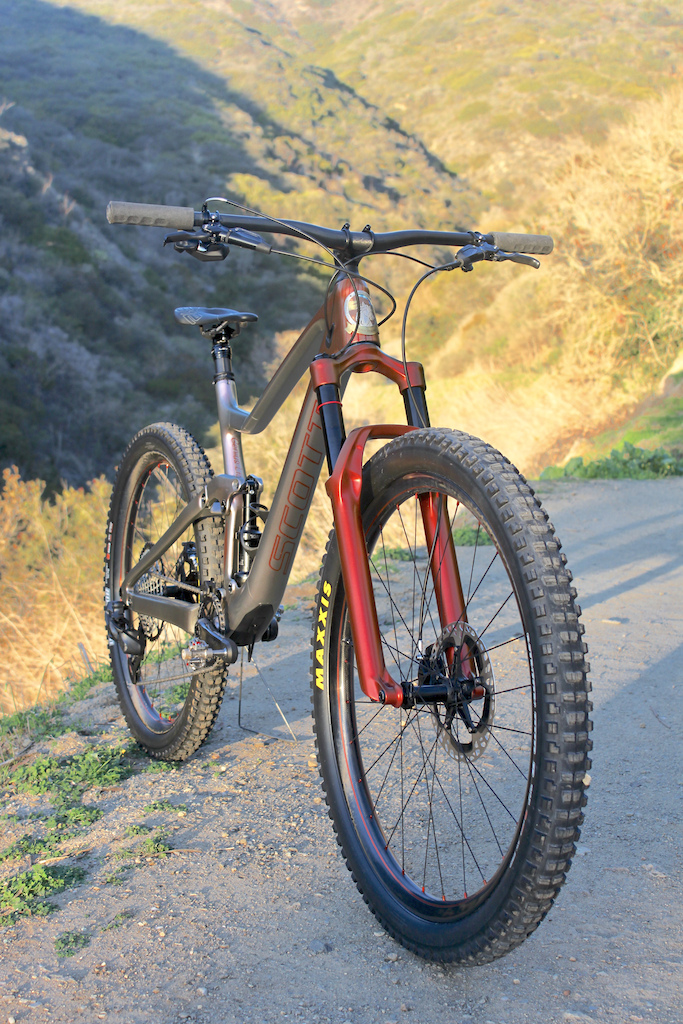
Which is not bad seeing as how this mullet configuration, with a 160mm fork, huge 2.6 x 29 monster front tire, and a more "normal" 2.4 x 27.5 rear has the head angle at a proper and modern 63.7°.
Maybe 2.5" tires front and rear would be a better choice to steepen the head angle a bit. Even so, 436mm chainstays keep direction changes lively and agile.
During the parts gathering phase, I (blindly) followed the trend towards more handlebar sweep, opting for a 9° sweep x 20mm rise from MCFK. While they definitely fit the ethos of the build, I hadn't realized until recently the 9° sweep was losing me way too much (effective) reach, causing my hands to be at least 20mm behind their normal position. This gave the slight sensation that I was falling off the back of the bike, as if my body weight was pulling back on my hands, unless I made a conscious effort to be very aggressive with bent elbows and forward weight shift.
Swapping to my normal 6° sweep x 15mm rise (also MCFK) has brought my weight forward to where it should be, and pairing these with the 17° version of the same Newmen stem has allowed me to keep the same hand height, AND lose some stem spacers. The total bar/stem weight is down to 198g. Minus a chunk of steer tube and spacers ftw.
Have you ever asked yourself why it's so blindly accepted... an automatic yes, to just run a 0°-6° stem, plus an inch+ of spacers, rather than choosing a stem rise and bar rise that get your hand position where it needs to be without using 25mm+ stem spacers? Why is it ok to have those extra/unneccesary spacers sloshing around on extra/unneccesary steerer tube length, which create extra movement and flex? It's also an easy weight savings. Having found this current bar/stem combo, I'll never go back
Part of the initial "strategic compromises" to keep the weight down was the KS LEV Ci Carbon Titanium 150mm dropper post. If you haven't seen one of these, the lower post (the part inserted into the frame) is carbon, as well as the lower seat rail cradle, with Ti clamp bolts. We can agree that 150mm is the bare minimum, and I've only occasionally felt the fully dropped seat brush any hangy-down parts during steeper drops.
So I do have a 175mm post of the same model on tap for when this one needs service. And by my calculations I could barely run a 200mm drop post if fully slammed.
Though maybe not quite at BikeYoke levels of reliability, with the previous LEV post I've gotten a good 4 years between service intervals on the previous bike, so for this build it's worth the upside of feathery lightness. This is topped off with the excellent, also ridiculously light (145g) yet very comfortable SQLab 612 saddle. Between this and their very slightly heavier 611, I'll never ride another saddle.
There is something to be said for the DW Link suspension on a Ripmo, and how it intuitively knows whether you're going up or down, and adapts accordingly.
But there's also something so pleasing about a well designed Horst Link bike for front-to-rear suspension balance, suppleness, traction, all out plushness when pointed down, and (to me) much easier and more intuitive manualing.
Also, for this build I had decided early on to go with a mullet setup, which this frame is designed to run either 27.5 or 29 wheels.
Why mullet? For basic reasons such as, less carbon, rubber, less metal spoke length equals less weight, especially where it counts most - rotating mass. But also for more subtle reasons like less unsprung weight for more responsive suspension, snappy cornering, less rim/wheel flex when stuffing it into corners/blasting berms, less butt rub on the pucker-y steep sections. and I also find a 27.5" rear wheel easier to wheelie or get up into a manual.
One other reason: Big wheels require a correspondingly smaller chainring to get the same final gear ratios. For this bike I wanted to run the largest chainring possible, as I like the way this combination transfers power on a modern 1x12 drivetrain. I had hoped to stuff a 36t ring onto the bike, with the 10-52 Garbaruk wide-range cassette making that usable.
But alas, the max possible was 34t, and even this gave only a feeler gauge's distance between the chairing and hand-formed titanium chain suck guard. Probably a more ideal combo anyway.

Custom made, hand-formed from titanium sheet chain suck guard. And a more-effective-at-keeping-things-silent chain slap protector borrowed from a Ransom.

Newmen forged 2-bolt Evolution SL 318.2 stem with ti hardware is an astounding 69g and is without rider weight or usage limitations. Made in Germany MCFK carbon bars, and a one-piece aluminum top cap and bolt complete the package.
Another area of... controversy may be the choice of RaceFace Next SL G5 carbon cranks. Though I'm fairly strong and ride hard, I'm also light and (mostly) finesseful, and my past experience with Next SL G3 was without issue for 5+ years of punishment. So I have no concerns about these G5 versions and they've been trouble-free so far.
While we're on the subject, how about that press-fit BB? Talk amongst yourselves...
After facing the frame BB area to perfection by leveling any paint drips and imperfections down to bare carbon, I installed the excellent Hope PF41 stainless bearing bottom bracket. After many months of flogging, it's still smooth and silent.
Choices... Choices... Strategic component choices.
The basic strategy going into the build was to select at least 2-3 possibilities for each component, and if the performance level was equal, then pick the lightest option.
Otherwise, if the weight difference between parts was significant enough to matter (on a build like this every gram matters), then I would make a strategic decision of how much performance I'd be willing to trade for the weight savings.
One example would be the Pike Ultimate, vs something like a Fox 36. The weight savings was enough to sway me, as was the fact that the Pike Ultimate came with the frameset, so a significant $$ savings.
On the subject of forks, one strategic compromise I made was to keep the stock (custom for Scott) lockout mechanism and damping internals, though (I believe) similar to the Fox 36 Fit4 vs Grip2, this lockout version of the Pike lacks a bit of suppleness and adjustability. It's still pretty good and I can live with it for now.
Likely the most important choice aside from the frame, is what direction to go on the wheelset. I really struggled on this and went round and round between the many possibilities.
To break the stalemate I consulted with the world's lightweight component meisters at R2 bike in Germany for options and recommendations. For this build I was prepared to go full Gucci, and their master wheel building team steered me towards a 35mm internal rim from MCFK in Germany.
These feature spoke holes that aren't drilled, but formed/laminated in place with back sides that are shaped to mate with the spoke ball ends to spread the spoke tension loads.
We paired these unbelievably exquisite hoops with the latest and lightest DT Swiss 180 hubs, Sapim CXRay spokes, and I sent them some 7075 aluminum nipples that I had sourced that were the perfect burnt orange color (vs the normal pumpkin/KTM orange).
These wheels became the centerpiece of the build, and at only 1380g for the set, they fit the theme perfectly.
What about those brakes?
For all of the other boutique and exotic parts, those SRAM G2 Ultimate brakes may not look so Gucci.
This was a strategic and conscious choice. While I could've gone with something from Trickstuff for proper Gucci cred, the more important factor - along with weight - is the ability to walk into ANY shop around the world and get parts.
Since many of these parts were gathered during worldwide covid madness, I had to go with what was readily available, yet super light and highly functional. Sure, there may be something that locks the wheels more easily, and possibly shaves a few grams, but in combination with the Shimano RT99 XTR IceTech rotors, I love the modulation, they're fade-free and I've never wanted for more power.

Wheels worthy of the bike. Stunning 35mm internal MCFK hoops from Germany, paired with DT 180 hubs, Sapim CXRay spokes and burnt orange 7075 aluminum nipples. Masterfully hand-built by R2 bike in Germany. 1380g for the set. For a finishing touch I added the burnt orange chrome stripes. The vintage Schwinn vibe is not an accident.
Whaddaya call that thing?
a) Super-Trail™?
b) Enduro-Lite?
c) Down country without the limitations?
d) Or, just a super versatile and responsive mountain bike.
At it's core, I wanted to experiment with just how light, capable AND not fragile I could make this bike, by using the finest, (safely) engineered to the nth degree parts from around the world (which, oddly or not, ended up being mostly German), with zero wispy, untested, fly-by-night Chinese parts. The only Chinese part is a quite marvelous 7g expanding aluminum star nut, with one-piece aluminum top stem cap and bolt.
Really had to pull out all the stops to hit 25lbs (11.36kg)… Through careful parts selection and hyper detailed implementation.
We’re talking ridiculousness like titanium dropper and lockout cables with composite housings. Even a custom made chain suck protector, hand formed from titanium sheet.
The pedals are 210g XPEDO M-Force 8 Ti with Titanium Axle and body. They feature 3 sealed bearings for smoothness and reliability, and they have been amazing so far. They do have a 180lb rider weight limit.
Being 160lb in full gear, with my road gapping, back-flipping days mostly behind me, I can get away with all of this, where those of you with more endomorph, Clydesdale or bike park tendencies may need to beef up a few component choices.
Though it's fully InvisiFrame wrapped, it ain't no trailer queen. I've absolutely punished this bike down some of the world's most gnarly and butt-puckering EWS stages, on the edge at warp speed (for me), chasing some wicked fast riders... and came out alive. This beauty already has some scars.
I knew going into situations like this the bike would be at or near it's limits (or beyond, especially the EXO casing tires), but even I was a bit surprised that it never felt dangerously or uncomfortably so. I'm sure the 160mm fork, slack head angle and Avalanche-tuned shock helped this level of confidence.
In the real world, most every lightweight dream build like this will gain a little weight as the bike evolves. After rolling the dice with the lightweight and thin tires, the next rear tire change will see an EXO+ installed. Since over decades of riding I've only cut 2 or 3 sidewalls, it'll be fine.
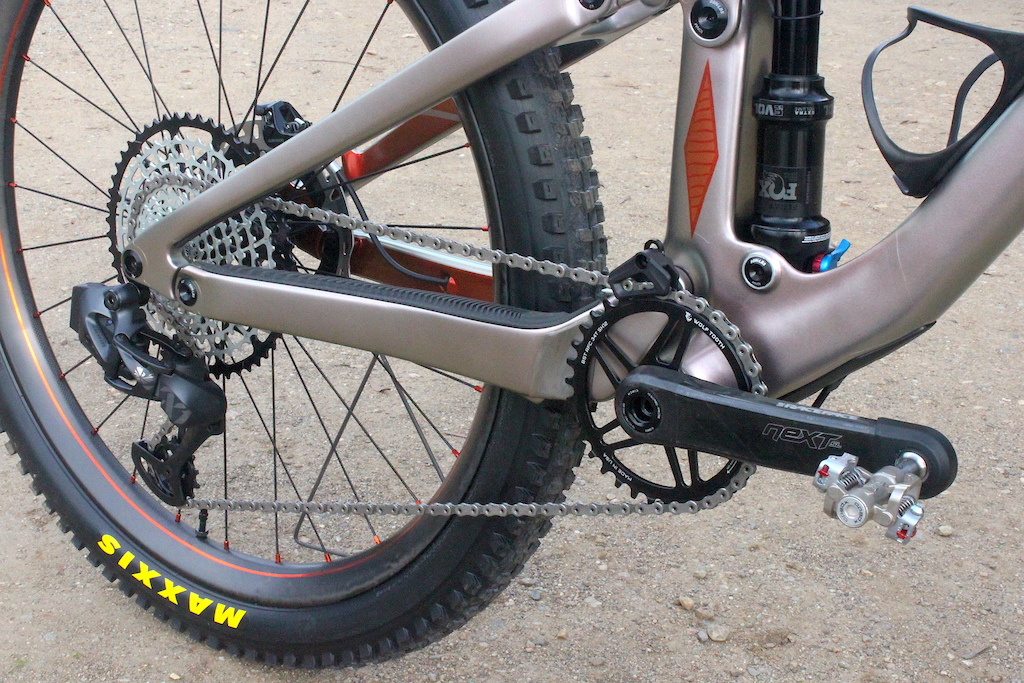
A mis-match made in heaven. XX1 AXS shifter and deraileur, the latest 12 speed Shimano XTR chain wrapped around a Wolf Tooth 12-speed Shimano-specific 34t chainring, driving a beautiful and lightweight 10-52 cassette/piece of jewelry from Garbaruk in Poland.
The first version of the dream build featured a Fox DPS shock custom-valved for my weight and riding style, completely tricked out by Avalanche. Quite a revelation on the trail! Super plush yet controlled in all conditions. This also was a big help in keeping the bike's weight down. Currently running the Fox Nude (internally it's a Fox DPS) with all of the same Avalanche tricks, only featuring the Nude/Twin-Lock air chamber closing mechanism and "Ramp Switch". A bit heavier, but It's like being able to install 1 or 3 volume spacers on the fly, effectively shortening the travel and raising the BB for steep climbs.

A closer look at the Garbaruk 10-52 cassette. Polish jewelry.

The pedals are 210g XPEDO M-Force 8 Ti with Titanium Axle and body. They feature 3 sealed bearings for smoothness and reliability, and they have been amazing so far. They do have a 180lb rider weight limit.
What good is a custom bike without custom paint?(The question that opened up a can of worms...)
During the planning stages I thought it would be cool and appropriate to have the frame custom painted before commencing the build. That is, until I shopped around for the right person to do it and got some idea of cost. Stripping and painting the frame and fork and shooting it with anything remotely like what I wanted was going to be $2000+. No thanks...
So I thought, "I can do that". And having spent much of my childhood and young adult-hood around body and paint work, and having used all of the equipment and materials at one time or another... I probably could.
But with such a busy life, little time, and not yet having a proper spray booth in my workshop, it would be quite a challenge. Both in time, and other challenges like chasing the whims of weather, temperature, humidity and darkness.
I'll spare you most of the details, as this story has already run long. But before I started, my skills were a bit rusty. After navigating the steep learning curve of CAREFULLY stripping and prepping carbon, and allowing the make-it-up-as-I-went design to unfold, I'd say it came out pretty ok.
Some of you may pick up on a vintage Schwinn vibe from the late 1930s to early 50s. Albeit from a strange parallel universe. That's intentional. I've always loved those bikes.
The copper-y orange, and the soft, misty/pearly main color actually came about by accident/experiment, because I wasn't happy with the stark look of the deep red-orange pinstripe outlines on a nearly chrome silver. It was very harsh on the eyes.
So I mixed up a very diluted candy burnt orange into the clear topcoat, and began fog some layers onto the front section, and about 4 coats in, the copper-y color you see here came to life.
Then came the question of what to do with the stark and cold looking "almost-chrome". So I poured a small pot of clear topcoat and mixed in some color shift pearl, which depending on the lighting and angle, shifts from red to orange to gold to green, and began to fog it all over the frame. One coat... two coats... a little was good... a little more was better, and at 6 coats, it was dazzling.
I then waited about 5 weeks for it to fully cure and out-gas before I had a pro come out and install the InvisiFrame custom cut full wrap on the frame and fork.
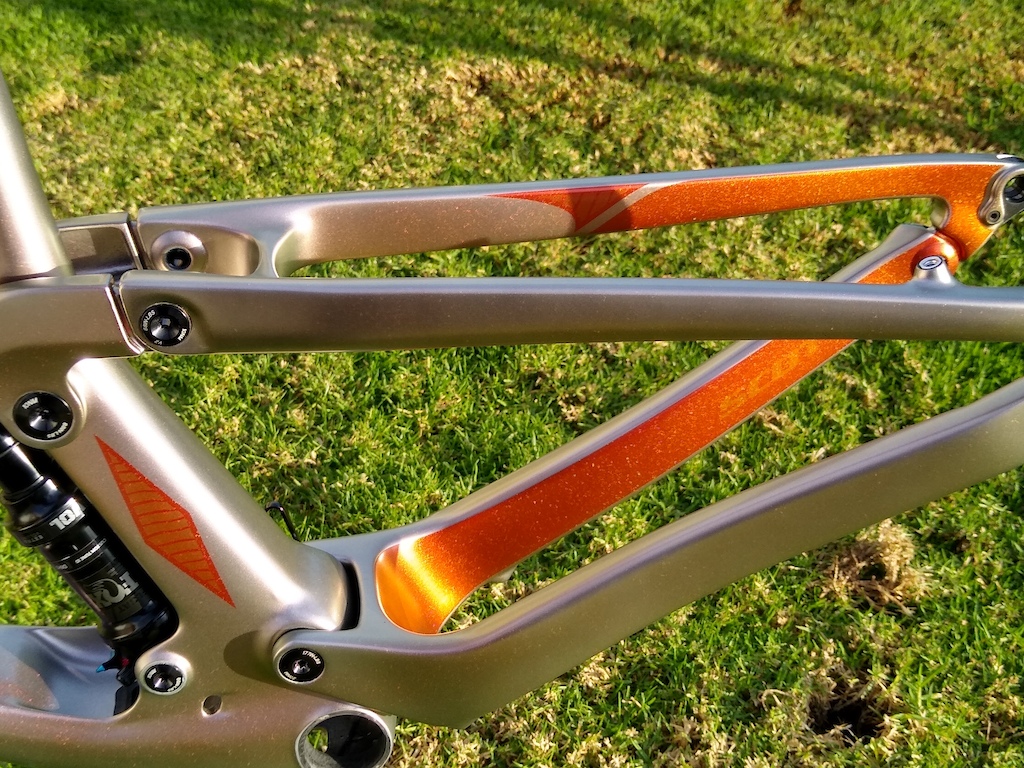
The color-shift pearl sparkle is impossible to capture with a camera. In different lighting and different angles it will shift from red to orange to gold to green. It's unaffected by the matte InvisiFrame wrap. Also a good view of the business end of the shock, featuring carbon links with aluminum hardware, flip chip, titanium shock bolt, with an RWC roller bearing kit in the upper shock eye.

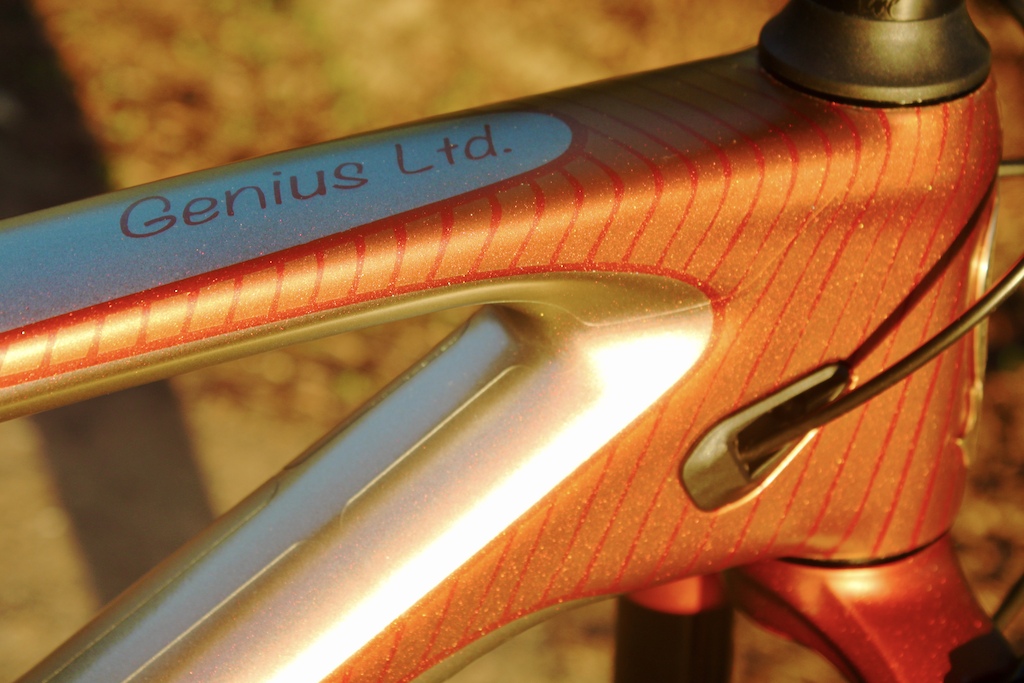
Another cool effect that's difficult to capture with the camera, is the orange holographic flakes buried deep in the base coat, under the candy burnt orange.


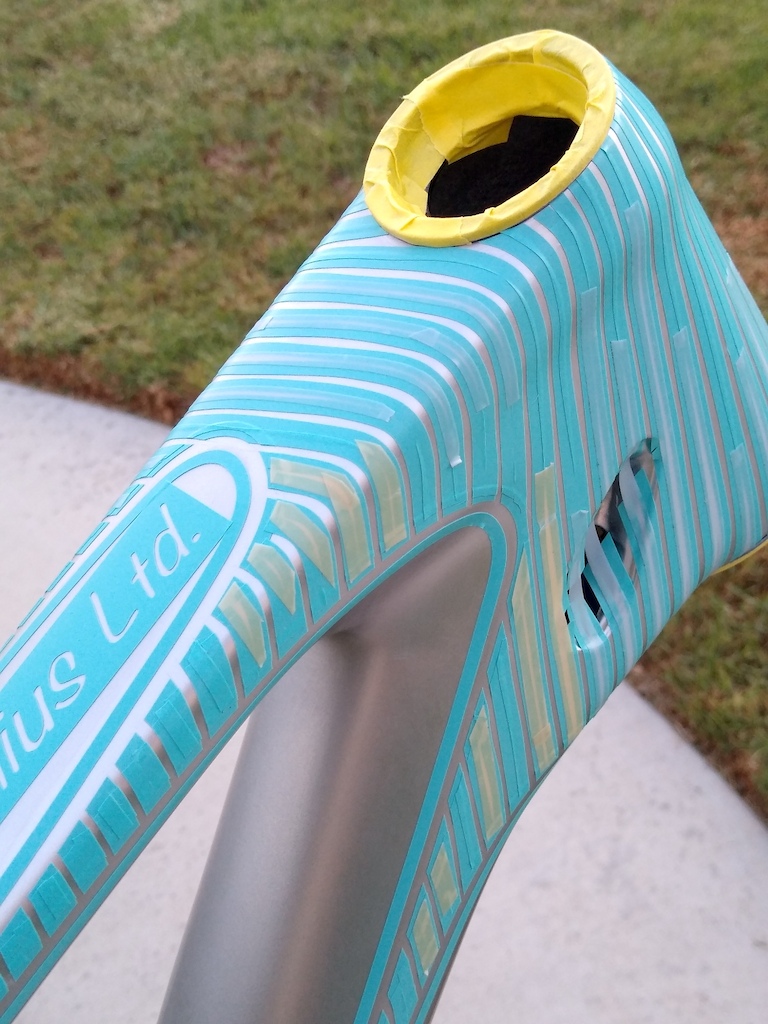
A mask job so detailed that it made my eyes and brain hurt, and felt like it took years out of my butt and back. Had to do this work in short sessions... otherwise it was too painful.


Finally... ready to start painting
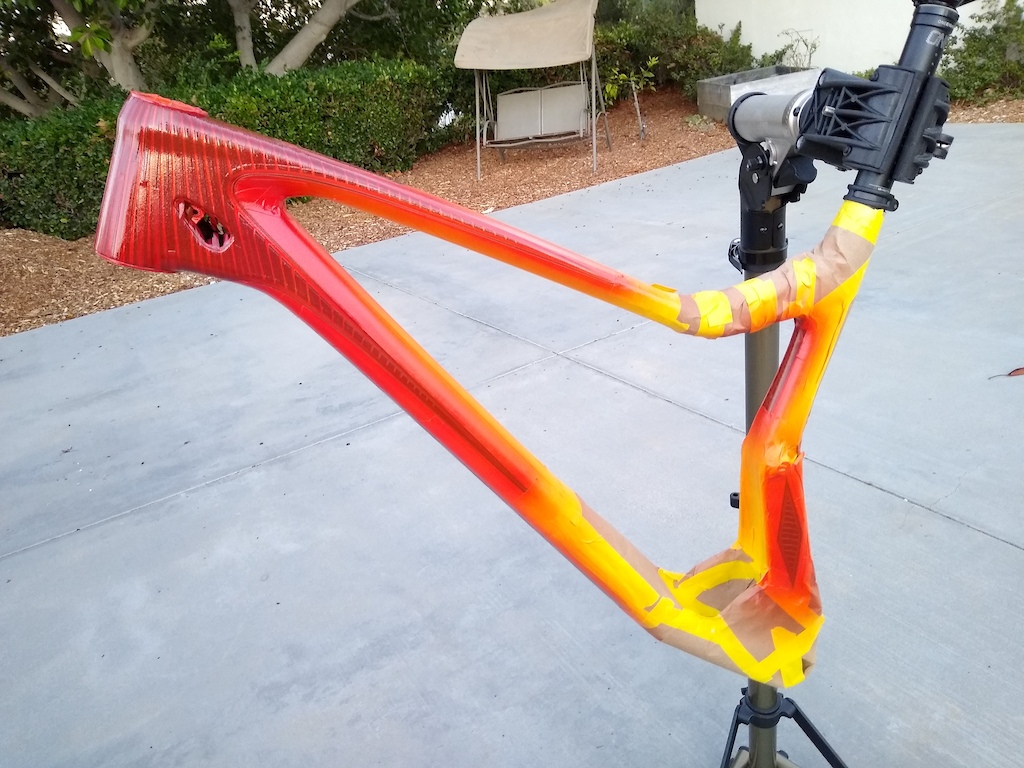
Doesn't look like much... yet.
What if your ideal downcountry/trail/enduro bike wasn't what you originally had in mind?
If nothing else I hope this build experiment has inspired you to re-think the possibilities for your next build.
Or at least give you some juicy bike porn to ogle while it's too cold, wet or muddy outside.
But what if you could have a bike that was at the same weight as a 120-130mm travel downcountry bike, yet had 20-30mm of extra travel on tap when needed for when you send it a little too deep, over-cook that corner, or just plain run out of talent?
I had considered one of the shorter travel downcountry options that have been the rage, but had to look elsewhere after considering the often brutal conditions I'm thrown into (blind), and the pace my buddies are riding, and the level of pucker when chasing them down trails they know yet I don't. This equals too little margin for error and too much penalty if/when things go awry.
Chances are you hadn't considered a Genius for your next ride, but maybe this makes a strong case. What if your ideal dream bike is flying under the radar for cheap in the Buy/Sell section?

In Czech Republic enjoying the fruits of labor!

This may not look like much through the camera lens, but the entry into this section is a blind thread the needle down the pointed nose of the rock, before linking together the rest of the narrow stone path. With an odd, low speed gap leap barely visible at 0:09.
What the two guys at the end are saying to each other (deadpan) in Polish:
Mosna? Mosna...
Which basically means: Possible? Possible...
Or maybe:
Doable? Yeah... doable...
Conclusion

• Crazy light = crazy responsive
• Custom valved rear shock is dreamy
• Amazing all-day, do-it-all bike

• So expensive I had to stop counting (not a dentist)
• Should I trust the baggage handling monkeys while traveling with this?
• 150mm dropper is just enough to get it done

About the Builder
Stats: Age: 53 • Height: 5'10" • Inseam: 32" • Weight: 160lb • Industry affiliations / sponsors: None
Bernie began mountain biking on a whim just out of high school 30-something years ago, after trading a box of motorcycle parts to a neighborhood kid for $100 plus this new-fangled mountain bike thing (a lovely filet brazed Schwinn Cimarron),
At that time he was a professional motorcycle racer, and the mountain bike provided an unexpected escape from what had started out as fun... but became a job - albeit with an extra pressure and intensity that comes from a job that could put you in a wheelchair, or worse.
That fine thread of a decision to take the bike, began a wild and meandering path which changed the entire direction of his life.
Ever the tinkerer and mad scientist with an advanced degree in MacGuyver Engineering, he was always looking for a better, more refined or effective way to do things. One day on a ride with a bunch of friends at Crystal Cove State Park in Corona Del Mar, making a left turn directly into the late afternoon sun, being blinded by the dust while dropping in, his "moto" background kicked in, and he wondered why these silly styrofoam mushroom head helmets didn't come with a visor.
So later that night he went to the workshop and cobbled together a functional and decent looking visor (with plastic from the side of a 5 gallon bucket), and velcro'd it to his helmet. The next week when he showed of to the group ride, everyone was like, "Dude!" where did you get that visor?! Long story short, that prototype would become the world's first mountain bike helmet visor, the "Cool-Head".
From there, a chance connection with the RC (Pinkbike's own mad scientist, Richard Cunningham) would eventually get him the opportunity to try out for the (then mythical) Mountain Bike Action "Wrecking Crew"... which snowballed into an unprecedented run of cover shots (ad nauseum).
Here's a snapshot of a once-in-a-lifetime experience I had with RC:
As some of you may or may not know, he has quite a background in pioneering and developing the early frame and suspension designs.
At some point the great John Tomac needed a new "DH" sled that was worthy of him, and his current employer / sponsor / bike company Raleigh didn't have a clue.
So RC was hired to design, develop and bring this new and groundbreaking machine to life.
One day as the JT prototype is on wheels and getting ready for testing, RC says to me (something to the effect of) “Hey, you’re a pretty strong rider, you’re about the same size as Johnny T… why don’t you take this out for a few weeks and try and break it.”
Well… as as a wide-eyed “kid” just out of high school, taking this all in… I may as well have been Neil Armstrong after the moon landing! What a memorable and thrilling moment to be a part of (and no, I wasn't able to break it).
Bernie is now the founder and Grand Poobah of FretGuru, giving guitar geeks around the world the innovative, precision tools to dial in their guitars.

Recognize this geek? Ever seen a Flamin' Pecker? The world's first mountain bike helmet visor, circa 1989.


Back in the day... the joys of 1.5" of rickety suspension... and cover boy appearances ad nauseum.


There was a time when you couldn't escape this ugly mug on the cover.
Author Info:
 Member since Feb 9, 2015
Must Read This Week
Sign Up for the Pinkbike Newsletter - All the Biggest, Most Interesting Stories in your Inbox
PB Newsletter Signup
What frame are you planning to build yours around?
Components is the big area for me to cut weight. Switch from a CC DB Air CS to a CC DBair IL Build wheels with a DIY Berd style rope spokes. XX1 cranks, 9point8 Fall Line R, 11sp Garbaruk cassette.
What's the basic rear suspension configuration?
Share pics when ready!
What frame are you planning to build yours around?