ZEP'S How-To: Mythbusters and How to Learn
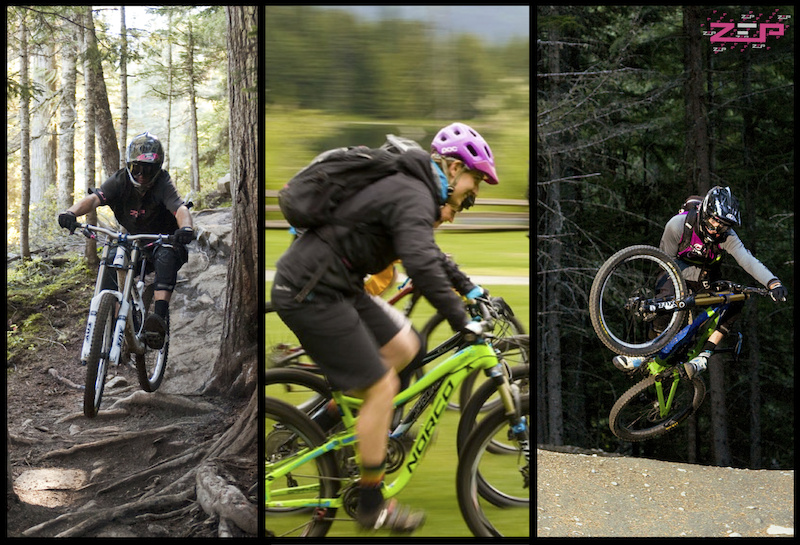
This is part of a new series of riding tips from ZEP Mountain Bike Camps where we will discuss some of the "classic" techniques we often see and hear in the industry that, simply put, can often hinder more than they help. These articles are intended for any rider interested in learning some core techniques to progress their skills, as well as for instructors/coaches who are looking to improve the quality and consistency of their lessons. The "myths" and topics we'll be taking a look at include;
BRAKING THROUGH DOWNHILL CORNERS
ELBOWS & CLIMBING TECHNICAL TERRAIN
BODY POSITION FOR RIDING DOWNHILL
SPEED CONTROL ON STEEPS & ROCK ROLLS
TECHNIQUES FOR FLAT VS. BERMED CORNERS
JUMPING PART I: MYTHS VS. FACTS
JUMPING PART II: THE 3 COMPONENTS OF AIR
![ZEP Techniques]()
But first, let’s take a look at why these "myths" exist in the first place...
Mountain biking is still a relatively young sport, so when people first started trying to write "how to” articles (or teach people), they naturally looked at techniques from the early days of mountain biking and also from other sports... like road biking. From there these myths have simply been regurgitated over the years, often resulting in a confusing message. The point is, some techniques in mountain biking haven’t always come from the most reliable, experienced resources, thereby creating “myths” in common riding technique. And unfortunately, this still happens in the industry today.
The other reason of course, is evolution. It's a natural part of any growing sport. As bikes, equipment and trails change, so do riding techniques. In this progression, some things don't evolve as quickly as they should do, resulting in some techniques from "back in the day" still bouncing around today and causing havoc!
One of our goals through our camps, clinics and instructor training at ZEP, has always been to not only improve the standards of teaching within the sport, but to also help bring consistency within the teaching so we can hopefully reduce the amount of conflicting information out there. Ultimately, we’re trying to make the sport easier and safer to learn, and this is what this series is all about… finding ways to have more fun on the bike, from proven, reliable, up-to-date information you can trust. Let's continue by taking a further look at why these myths exist and how we can change our approach to learning (and teaching), to improve your chances of success.
MYTHS FROM TEACHING “WRONG & RIGHT” RATHER THAN “CAUSE & EFFECTS"
There is a ton of professional research out there on the effects of positive learning, in a huge variety of different teaching and learning applications. People of all ages, backgrounds and ability levels, generally learn and perform best in a fun, positive environment. It is strange then that some instructors tend to teach techniques with a “right” vs “wrong” mantra. This naturally produces a negative learning environment since the only way to assess and improve a student is to find out what they are doing "wrong", so it can be "corrected".
![credit www.timhailwoodphotography.com]()
Instead of this, try to think of skills and techniques as “tools"; and like any tool, it can be used in a variety of different situations.
In some situations a tool might work really well and in others, less so. Every tool will have a list of advantages and disadvantages and from understanding these, a rider can then make a better (more educated) decision of when to use what technique, and why. Both instructor and student gain a better understanding of the relationship between the cause and effect of each, particular technique, making the learning environment far more effective (and fun!). Some simple examples can be used to help gain a better appreciation of this "Cause & Effect" relationship. I've chosen the following example as we've seen many riders (and instructors) in recent times who have been told they can NEVER drop their outside pedal. Let's take a look and figure it out...
PEDAL POSITION IN FLAT CORNERS
Technique 1: Drop the outside pedal
PROS
- Can help riders lean the bike more underneath them, allowing them to turn the bike more, aiding traction and stability
- Can make it easier for a rider to "push" down into the bike, aiding traction
- Can help riders move their hips laterally, keeping their body more on top of the bike for better stability
CONS
- Can cause riders to get "stuck" in one position through a corner, making it more difficult to adjust during the corner
- Transfers most of the riders weight to one leg. One leg is not as strong as two.
- Trying to drop the outside pedal between corners that link quickly can cause riders to lose traction, stability and flow
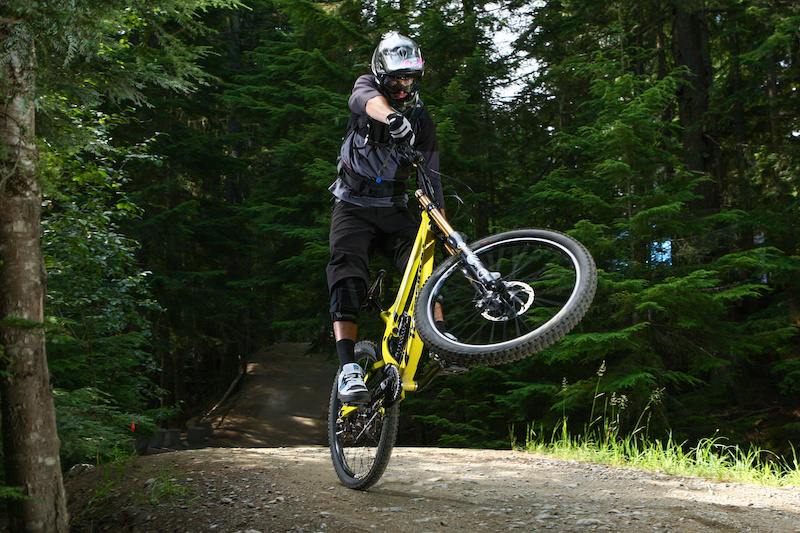
![Steve Peat always corners with perfect style and it s no surprise Josh does the same.]()
Technique 2: Keep the pedals level.
PROS
- Can help riders deal better with bumps and changes in the corner, since they are sharing their weight between both legs
- Can help some riders have more adjustability through the corner with moving and leaning the bike
- It's usually easier to pump the bike (for traction and speed in the corner) for most riders, when the pedals are level
CONS
- Some riders can find it difficult to "push" down on the bike, to generate pressure and grip (dropping the outside pedal can help this)
- Angulation (leaning the bike more than the body) can be harder with level pedals
- Can make it harder to move the body laterally across the bike, towards the outside of the corner, compromising stability and balance
While I've only described just a few points here, the reality is pretty clear... a rider could really do either one. Both techniques have their pros and cons. As such, simply teaching or learning that one is "right" and the other is "wrong", just doesn't make sense. For sure, we can help simplify things by saying that for most riders, most of the time, dropping the outside pedal in a flat corner will be easier for them and will give them a better result. However, if we really want to improve, we need to keep our mind open for how keeping the pedals level may help. And of course there's some middle ground too... you could drop the outside pedal only a small amount, and perhaps gain the best of both worlds.
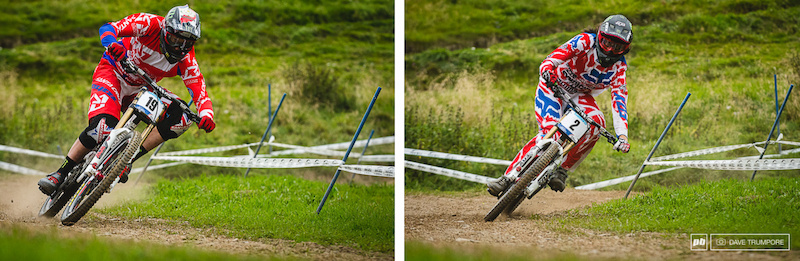
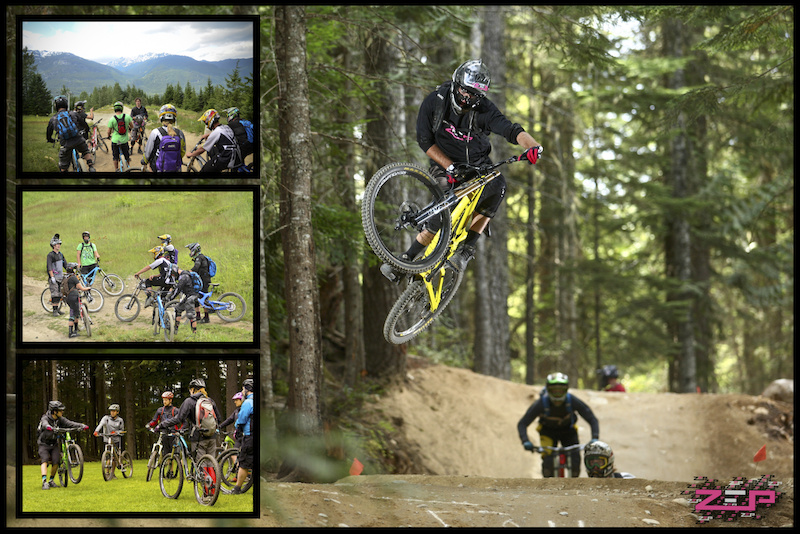
![Peaty and Mick Hannah head to head in the first round of heats.]()
Mic comes from more of a BMX background, riding berms with bikes that have very low seats; two things that make corner with level pedals more sense. He's also shorter, meaning there is less need for him to lower his weight (which dropping the outside pedal helps with). Peaty originally comes from racing XC mountain bikes with the seats up and mostly on flatter corners. Trying to corner with the seat up is very difficult unless you drop the outside pedal. Peaty is more used to this technique but also a lot taller which means dropping the outside pedal helps him get lower, which he needs more than Mic. Two riders, two different backgrounds, two different body types, two different techniques, both shredding!
From this approach, we can gain a deeper understanding of each, specific technique. Since no technique is labelled as “wrong”, every technique has the potential for being used, in some situation. The "wrong" technique in one situation could be the "right" technique in another... so it's not "wrong" in the first place. As a result, someone teaching has a much deeper pool of knowledge to draw from (particularly helpful when teaching advanced riders), and the student never feels like they are “doing things wrong”, and has the freedom to experiment to find what works best for them. The end result is a more progressive, "cause and effect" approach to teaching for the instructor, and a more positive, effective learning environment for the student.
The con to this "cause & effects" approach (their are pros and cons to everything!) is it doesn't always offer a clear cut, "black and white" approach. Unfortunately, in our quest to keep things simple, instructors and students sometimes want a "magical" answer that works all the time. A classic example is again with cornering. Corners are innately very diverse, so a technique that works in one corner, may not be the best "tool" for a different corner. However, the student wants to know how to ride "all corners", so the instructor tends to teach "this is how you ride corners". On the surface, the job is done, but in reality, the student walks away with the idea that they "do this in every corner"... and so potentially creating a new "myth".
![credit www.timhailwoodphotography.com]()
FOUR TIPS ON HOW TO LEARN
Be Patient... good technique takes time!
It's partly the culture of today's world; people want what they want, and they want it now. But mountain biking is a difficult sport (relatively speaking) and good, smooth, consistent technique takes a long time to learn. Be patient when you're learning, be open to different techniques and be careful of always looking for "one size fits all" technique, or a "quick fix". For sure, there are simple techniques that do help when applied most of the time, but that doesn't mean everything in biking has a simple answer.
Try to embrace the process of learning and enjoy the progression. The sooner you stop worrying about what you "can't do", and focus on "how much you've improved", the better. When I was a kid, it took me six months practicing wheelies everyday until I could wheelie for any real distance... and even then it was still only for twenty metres! Also, bear in mind when you started mountain biking. If you've started as an adult you have inherently missed out on years (thousands of hours) of skill development that you would have had, if you started as a kid. Many adults forget this so try not to get frustrated if you're not learning things as quickly as others.
Ask yourself... are you ready?
This kind of ties in with being patient. Just because you want to learn something, doesn't mean you are ready to. Make sure you have enough skills, experience and knowledge before moving on to the "next thing". For example, if someone wants to learn to jump, I first assess their core riding skills, such as Position & Balance, Pressure Control & Timing. Then I assess what other, more basic maneuvers can they already do. They want to learn to jump, so, it makes sense that before they learn this, they should be able to at least do some basic drop offs, front and rear wheels lifts and maybe even a bunnyhop or wheelie. If they are still trying to learn these more basic maneuvers, then they typically aren't ready to jump. So, a note to instructors... just because your client asks to learn something, it doesn't mean they get to! Assess them first and decide if they are ready before anything else.
One thing at a time...
Teaching more than one thing at a time is difficult... at least to teach it safely and effectively. Learning more than one thing at a time is even more difficult. Think of techniques as tools in a tool box... you can only use one at a time. It's better to do one thing well (and improve it), than a few things poorly. The other reason you want to try and focus on one skill at a time is knowing how it affects your riding. If you are trying to do three things at once and you feel a difference in your riding... how do you know which technique helped? On the other hand, if you are working on only one technique and you feel a difference, you will know exactly why. The learning is more efficient, objective and ultimately faster.
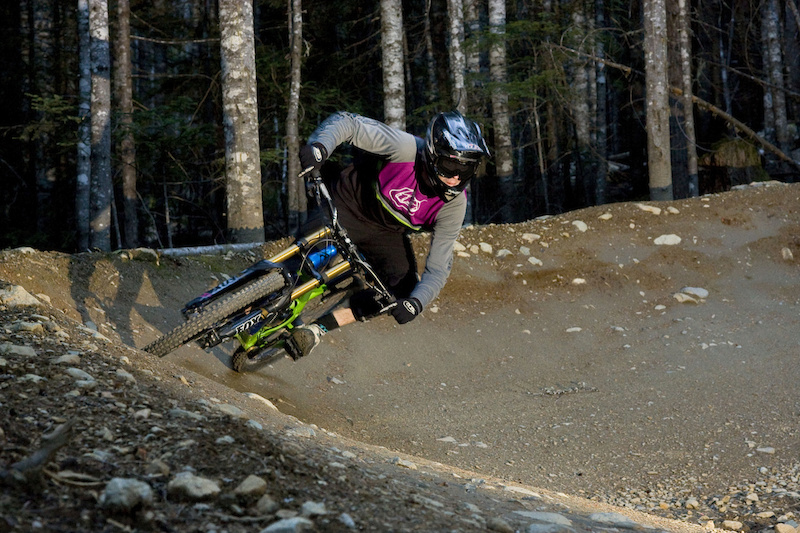
Easier terrain vs. harder terrain...
Many riders typically choose to "push their riding" by trying to ride faster or on harder trails. While this can definitely help progress your skills, it can represent a "do or die" environment for learning. Teaching riders from a beginner level all the way up to coaching athletes on a world-cup stage often involves a more progressive approach, that we call Minimum Terrain - Maximum Technique. Easier terrain (based on the rider's ability) provides an environment that is better suited to trying new things. The rider feels comfortable enough to not only think about something specific but to also physically try it. Difficult terrain makes it very challenging for a rider to try anything other than "survive" and get down safely. On easier terrain, a rider can also work on new techniques more often and to a greater extent: they can exaggerate it. Exaggerating techniques is a great way of building new muscle memory and learning more quickly and effectively. Finally, it is also much safer! Since the terrain is easier, the rider can choose how much they want to push it. So, trying to ride an easier trail but maximizing the technique helps you learn faster, learn better, while keeping you safer.
![ZEP s How To]()
Manuals can be great for developing Position & Balance, or Braking skills. Inside lines and squaring off corners can be great for developing Direction Control skills, like leaning the bike or rotating the hips & knees. Ride a familiar trail, be creative, try different lines and ride it faster... you'll be amazed how much this can develop your fundamental riding skills
In the next article, we'll take a look at the myth of "not braking in corners", and go through some ideas that will explain why, when and how braking in corners can actually help your riding.
'Till next time,
Paul
ABOUT ZEP
ZEPtechniques is a Whistler-based mountain bike camps and instructor training company. Established in 2006, ZEP offers single and multi-week, adult specific rider improvement camps, as well as weekly clinics, private lessons and tours. ZEP's Instructor Training services include the industry's original, multi-week mountain bike instructor training camps; training riders four days per week with evening seminars on suspension set up, bike mechanics, nutrition, as well as strength & conditioning sessions, all with industry experts. As developers of the internationally available Professional Mountain Bike Instructors Certifications and Directors of the PMBI Association, ZEP has long played a key role in establishing and improving the finest teaching practices and instructor certifications, within mountain biking.
![ZEP s How To]()
ZEP is proudly supported by
Transition Bikes
Fox Racing Shox
Troy Lee Designs
EVOC
Five Ten
MRP
ANVL Components
Vorsprung Suspension
Reel Cameras
Spun Studios
ZEP Facebook
ZEP Twitter | @ZEPMTBCamps
ZEP Instagram | @zepmtbcamps
Photos
@davetrump
@parisgore
Tim Hailwood Photography
MENTIONS: @TransitionBikeCompany, @foxracingshox, @troyleedesigns
BRAKING THROUGH DOWNHILL CORNERS
ELBOWS & CLIMBING TECHNICAL TERRAIN
BODY POSITION FOR RIDING DOWNHILL
SPEED CONTROL ON STEEPS & ROCK ROLLS
TECHNIQUES FOR FLAT VS. BERMED CORNERS
JUMPING PART I: MYTHS VS. FACTS
JUMPING PART II: THE 3 COMPONENTS OF AIR
But first, let’s take a look at why these "myths" exist in the first place...
Mountain biking is still a relatively young sport, so when people first started trying to write "how to” articles (or teach people), they naturally looked at techniques from the early days of mountain biking and also from other sports... like road biking. From there these myths have simply been regurgitated over the years, often resulting in a confusing message. The point is, some techniques in mountain biking haven’t always come from the most reliable, experienced resources, thereby creating “myths” in common riding technique. And unfortunately, this still happens in the industry today.
The other reason of course, is evolution. It's a natural part of any growing sport. As bikes, equipment and trails change, so do riding techniques. In this progression, some things don't evolve as quickly as they should do, resulting in some techniques from "back in the day" still bouncing around today and causing havoc!
One of our goals through our camps, clinics and instructor training at ZEP, has always been to not only improve the standards of teaching within the sport, but to also help bring consistency within the teaching so we can hopefully reduce the amount of conflicting information out there. Ultimately, we’re trying to make the sport easier and safer to learn, and this is what this series is all about… finding ways to have more fun on the bike, from proven, reliable, up-to-date information you can trust. Let's continue by taking a further look at why these myths exist and how we can change our approach to learning (and teaching), to improve your chances of success.
MYTHS FROM TEACHING “WRONG & RIGHT” RATHER THAN “CAUSE & EFFECTS"
There is a ton of professional research out there on the effects of positive learning, in a huge variety of different teaching and learning applications. People of all ages, backgrounds and ability levels, generally learn and perform best in a fun, positive environment. It is strange then that some instructors tend to teach techniques with a “right” vs “wrong” mantra. This naturally produces a negative learning environment since the only way to assess and improve a student is to find out what they are doing "wrong", so it can be "corrected".
Instead of this, try to think of skills and techniques as “tools"; and like any tool, it can be used in a variety of different situations.
In some situations a tool might work really well and in others, less so. Every tool will have a list of advantages and disadvantages and from understanding these, a rider can then make a better (more educated) decision of when to use what technique, and why. Both instructor and student gain a better understanding of the relationship between the cause and effect of each, particular technique, making the learning environment far more effective (and fun!). Some simple examples can be used to help gain a better appreciation of this "Cause & Effect" relationship. I've chosen the following example as we've seen many riders (and instructors) in recent times who have been told they can NEVER drop their outside pedal. Let's take a look and figure it out...
PEDAL POSITION IN FLAT CORNERS
Technique 1: Drop the outside pedal
PROS
- Can help riders lean the bike more underneath them, allowing them to turn the bike more, aiding traction and stability
- Can make it easier for a rider to "push" down into the bike, aiding traction
- Can help riders move their hips laterally, keeping their body more on top of the bike for better stability
CONS
- Can cause riders to get "stuck" in one position through a corner, making it more difficult to adjust during the corner
- Transfers most of the riders weight to one leg. One leg is not as strong as two.
- Trying to drop the outside pedal between corners that link quickly can cause riders to lose traction, stability and flow
If dropping the pedal is good enough for these fellas, it's good enough for the rest of us!
Technique 2: Keep the pedals level.
PROS
- Can help riders deal better with bumps and changes in the corner, since they are sharing their weight between both legs
- Can help some riders have more adjustability through the corner with moving and leaning the bike
- It's usually easier to pump the bike (for traction and speed in the corner) for most riders, when the pedals are level
CONS
- Some riders can find it difficult to "push" down on the bike, to generate pressure and grip (dropping the outside pedal can help this)
- Angulation (leaning the bike more than the body) can be harder with level pedals
- Can make it harder to move the body laterally across the bike, towards the outside of the corner, compromising stability and balance
While I've only described just a few points here, the reality is pretty clear... a rider could really do either one. Both techniques have their pros and cons. As such, simply teaching or learning that one is "right" and the other is "wrong", just doesn't make sense. For sure, we can help simplify things by saying that for most riders, most of the time, dropping the outside pedal in a flat corner will be easier for them and will give them a better result. However, if we really want to improve, we need to keep our mind open for how keeping the pedals level may help. And of course there's some middle ground too... you could drop the outside pedal only a small amount, and perhaps gain the best of both worlds.

Mic and Peaty showing both techniques in pretty much the same corner... neither is wrong or right, just pros and cons.
Mic comes from more of a BMX background, riding berms with bikes that have very low seats; two things that make corner with level pedals more sense. He's also shorter, meaning there is less need for him to lower his weight (which dropping the outside pedal helps with). Peaty originally comes from racing XC mountain bikes with the seats up and mostly on flatter corners. Trying to corner with the seat up is very difficult unless you drop the outside pedal. Peaty is more used to this technique but also a lot taller which means dropping the outside pedal helps him get lower, which he needs more than Mic. Two riders, two different backgrounds, two different body types, two different techniques, both shredding!
From this approach, we can gain a deeper understanding of each, specific technique. Since no technique is labelled as “wrong”, every technique has the potential for being used, in some situation. The "wrong" technique in one situation could be the "right" technique in another... so it's not "wrong" in the first place. As a result, someone teaching has a much deeper pool of knowledge to draw from (particularly helpful when teaching advanced riders), and the student never feels like they are “doing things wrong”, and has the freedom to experiment to find what works best for them. The end result is a more progressive, "cause and effect" approach to teaching for the instructor, and a more positive, effective learning environment for the student.
The con to this "cause & effects" approach (their are pros and cons to everything!) is it doesn't always offer a clear cut, "black and white" approach. Unfortunately, in our quest to keep things simple, instructors and students sometimes want a "magical" answer that works all the time. A classic example is again with cornering. Corners are innately very diverse, so a technique that works in one corner, may not be the best "tool" for a different corner. However, the student wants to know how to ride "all corners", so the instructor tends to teach "this is how you ride corners". On the surface, the job is done, but in reality, the student walks away with the idea that they "do this in every corner"... and so potentially creating a new "myth".
Corners come in many different shapes and sizes so the techniques we use can greatly vary.
FOUR TIPS ON HOW TO LEARN
Be Patient... good technique takes time!
It's partly the culture of today's world; people want what they want, and they want it now. But mountain biking is a difficult sport (relatively speaking) and good, smooth, consistent technique takes a long time to learn. Be patient when you're learning, be open to different techniques and be careful of always looking for "one size fits all" technique, or a "quick fix". For sure, there are simple techniques that do help when applied most of the time, but that doesn't mean everything in biking has a simple answer.
Try to embrace the process of learning and enjoy the progression. The sooner you stop worrying about what you "can't do", and focus on "how much you've improved", the better. When I was a kid, it took me six months practicing wheelies everyday until I could wheelie for any real distance... and even then it was still only for twenty metres! Also, bear in mind when you started mountain biking. If you've started as an adult you have inherently missed out on years (thousands of hours) of skill development that you would have had, if you started as a kid. Many adults forget this so try not to get frustrated if you're not learning things as quickly as others.
Ask yourself... are you ready?
This kind of ties in with being patient. Just because you want to learn something, doesn't mean you are ready to. Make sure you have enough skills, experience and knowledge before moving on to the "next thing". For example, if someone wants to learn to jump, I first assess their core riding skills, such as Position & Balance, Pressure Control & Timing. Then I assess what other, more basic maneuvers can they already do. They want to learn to jump, so, it makes sense that before they learn this, they should be able to at least do some basic drop offs, front and rear wheels lifts and maybe even a bunnyhop or wheelie. If they are still trying to learn these more basic maneuvers, then they typically aren't ready to jump. So, a note to instructors... just because your client asks to learn something, it doesn't mean they get to! Assess them first and decide if they are ready before anything else.
One thing at a time...
Teaching more than one thing at a time is difficult... at least to teach it safely and effectively. Learning more than one thing at a time is even more difficult. Think of techniques as tools in a tool box... you can only use one at a time. It's better to do one thing well (and improve it), than a few things poorly. The other reason you want to try and focus on one skill at a time is knowing how it affects your riding. If you are trying to do three things at once and you feel a difference in your riding... how do you know which technique helped? On the other hand, if you are working on only one technique and you feel a difference, you will know exactly why. The learning is more efficient, objective and ultimately faster.
Easier terrain vs. harder terrain...
Many riders typically choose to "push their riding" by trying to ride faster or on harder trails. While this can definitely help progress your skills, it can represent a "do or die" environment for learning. Teaching riders from a beginner level all the way up to coaching athletes on a world-cup stage often involves a more progressive approach, that we call Minimum Terrain - Maximum Technique. Easier terrain (based on the rider's ability) provides an environment that is better suited to trying new things. The rider feels comfortable enough to not only think about something specific but to also physically try it. Difficult terrain makes it very challenging for a rider to try anything other than "survive" and get down safely. On easier terrain, a rider can also work on new techniques more often and to a greater extent: they can exaggerate it. Exaggerating techniques is a great way of building new muscle memory and learning more quickly and effectively. Finally, it is also much safer! Since the terrain is easier, the rider can choose how much they want to push it. So, trying to ride an easier trail but maximizing the technique helps you learn faster, learn better, while keeping you safer.
You can ride Crank It Up. Great. Can you manual over the jumps, take inside lines, or bunnyhop over things as you go down it?
Manuals can be great for developing Position & Balance, or Braking skills. Inside lines and squaring off corners can be great for developing Direction Control skills, like leaning the bike or rotating the hips & knees. Ride a familiar trail, be creative, try different lines and ride it faster... you'll be amazed how much this can develop your fundamental riding skills
In the next article, we'll take a look at the myth of "not braking in corners", and go through some ideas that will explain why, when and how braking in corners can actually help your riding.
'Till next time,
Paul
ABOUT ZEP
ZEPtechniques is a Whistler-based mountain bike camps and instructor training company. Established in 2006, ZEP offers single and multi-week, adult specific rider improvement camps, as well as weekly clinics, private lessons and tours. ZEP's Instructor Training services include the industry's original, multi-week mountain bike instructor training camps; training riders four days per week with evening seminars on suspension set up, bike mechanics, nutrition, as well as strength & conditioning sessions, all with industry experts. As developers of the internationally available Professional Mountain Bike Instructors Certifications and Directors of the PMBI Association, ZEP has long played a key role in establishing and improving the finest teaching practices and instructor certifications, within mountain biking.
ZEP is proudly supported by
Transition Bikes
Fox Racing Shox
Troy Lee Designs
EVOC
Five Ten
MRP
ANVL Components
Vorsprung Suspension
Reel Cameras
Spun Studios
ZEP Facebook
ZEP Twitter | @ZEPMTBCamps
ZEP Instagram | @zepmtbcamps
Photos
@davetrump
@parisgore
Tim Hailwood Photography
MENTIONS: @TransitionBikeCompany, @foxracingshox, @troyleedesigns
Author Info:

Must Read This Week
Sign Up for the Pinkbike Newsletter - All the Biggest, Most Interesting Stories in your Inbox
PB Newsletter Signup
(Seriously)
An article to help improve my riding not just spend
all my little money?
Very nice!
LOVE IT!
Simon Lawton made a huge difference for me on that. Took a short clinic with him, and he's all about just always dipping the outside pedal while turning in your body, and dipping/committing more as needed. Basically likens the motion to what you're doing in skiing and tries to get you to do the whole thing in one dynamic motion, pumping the turn and staying nice and centered over your bottom bracket. Did some drills that drove that home in a really neat way to build some muscle memory. I'm a long way from having fully integrated that into my riding, but it's made a huge difference. Essentially, it takes what these guys are saying (there's lots of pros and cons for either technique) and gives you a mechanism to auto-adjust your body position and loading dynamically with the turn, with less thinking and more flowing. Check him out on fluidride.com.
think of your knee in front of your ankLe as "soft knees".
Keeping soft knees, which will mean more weight on your arms-shoulders will.
also. ... think about cycling no handed. You steer with your stomach. Imagine a pole coming straight out of your belly button. Point that pole where you want to go. The legs and knees will follow.
1. Soft knees
2. Point that belly button
If you find you are still struggling, do some front and side plank a couple of times a week, core is key to cornering.
Well, many riders consider themselves forward, when they are hanging off the back.
Just look at the position of the head and shoulders of pretty much every pro rider.
Every photo in the article has soft knees.
Clips and Flats also work very slightly different (hence why a clipped rider looks different to a flats rider often through a section).
Soft knees
www.rootsandrain.com/photos/759920
Forward....
www.rootsandrain.com/photos/697473
www.rootsandrain.com/photos/749718
www.rootsandrain.com/photos/744231
www.rootsandrain.com/photos/695096
Even I can do it sometimes
www.rootsandrain.com/photos/695305
www.rootsandrain.com/photos/689153
That's it that's all
www.pinkbike.com/photo/9463490
how much dinero to guarantee manuals and kovarik scrub, berm drift and destruction techniques in a 3 day camp?!
I shot this video last year - I think I smashed it. Also did one for jumps and it's funny how many views the jumps one has compared to basic body position when so many people don't get the fundamental weight through your feet position nailed. Interested to know what you think of it. There is more to it obviously but for a 2 minute video there is only so much you can go into...
The bit about dropping heels was well shown, and this is exactly why beginners should ride flat pedals as much as they can - because that is the right technique regardless of what kind of pedal you use, and flats won't let you get away with bad position or getting too tense on heels.
I often coach pointing in towards your front hub with you forefingers to encorage elbows out and you bar to rest more on the outside of your palm (ala ergons new 'enduro' grip). Most of my clients are people who have never adjusted their controls oit of the box though so I get them to play around with what suits them depending on each individuals preferences and style of riding. Elbows out and wrists straight always looks better in photos though:p
One thing if I may - manual. Do you start it with heels raised up or dropped? I am still struggling to get quite even raises of the front wheel into the float zone. I thought this would be a good first phase, to learn to pop that wheel high enough in a consistent manner, then learn to control fore aft balance, then side to side.
sorta on the subject --- don't believe all those high-tech websites that tell how to buy a bike -- IMO, those aren't worth a hoot ---not at all. you cant algorithm a firkin build kit into a computer database. Good buddy of mine spent a shit ton of time doing some sorta computer generated build kit for his over priced frame. I won't open up that can of worms letting you know that company name but, lets just say, they charged him extra for this so called "Professional Service" --- he provided all sorts of info about inseam, arm length, total height, shoulder width along with a whole bunch of other points of interest --- after getting the bike, riding it for a while -- he sold it... he hated it. said the feel of the bike was horrible, couldn't stand "the fit". there's a whole bunch of trial and error when it comes to a well built bike... what night have felt great on bike A might not feel great on bike B...
For what little it's worth, I have experimented with weighting (on different runs) the inside and the outside pedal. Weighting the inside resulted in me washing out at lower speed as did even weighting, that's just me though.
Lawton often discusses this topic, and explains a nice technique in one of his videos (Flow-Tonic I think.) I'll second g-42 that it's worthwhile checking out his courses and videos, even if just as a review of fundamentals we already "know" from another perspective: fluidride.com (you can also find his vids online, e.g., iTunes.) Perhaps Lawton's wrong, but I have to say I prefer his attempt to understand and explain better and worse over the above contradictory pros and cons of "technique 1" and "technique 2" that leave us with little more than "everyone's right and its group hug time!" ;-)
longer than usual, but still a good read. keep it up.
And how do we jump, by the way ?
I carve too but drifting is hellava lot funner.
Good "article" though. Roll on the next "installment".
I tend to jump the jumps, rather than manual over them. mad skills