RideWrap Launches New Replacement Piece Program
RideWrap Doing Its Job Taking The Hit So Your Bike Is Safe
Press Release: RideWrap
RideWrap is stoked to announce the release of our new Tailored Protection™ replacement piece program! The system was built by our in-house developers and enables riders to quickly select and order replacement pieces for their Tailored Protection™ Kits.
Our new Tailored Protection™ replacement piece program streamlines the process of getting new protection pieces. RideWrap protection kits are a wear-product. They take the abuse, so your bike and fork don’t. After RideWrap has done its job, you can go online and replace the tired piece of your protection kit.
What Is A Replacement Piece?
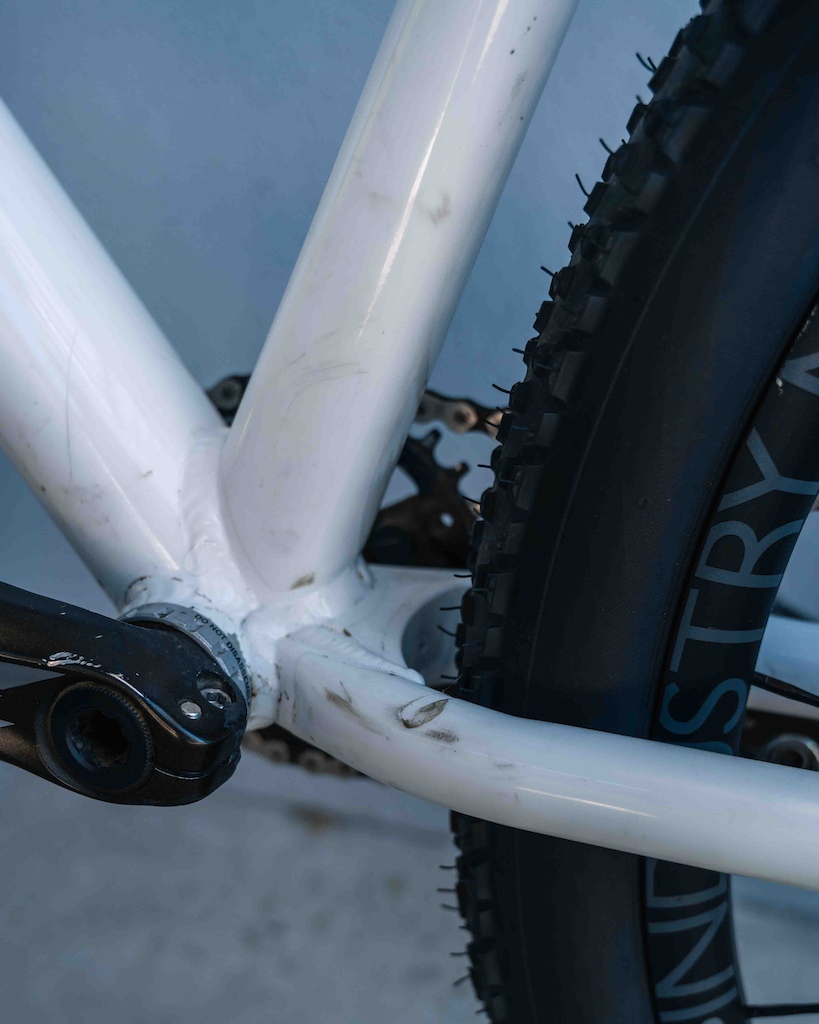
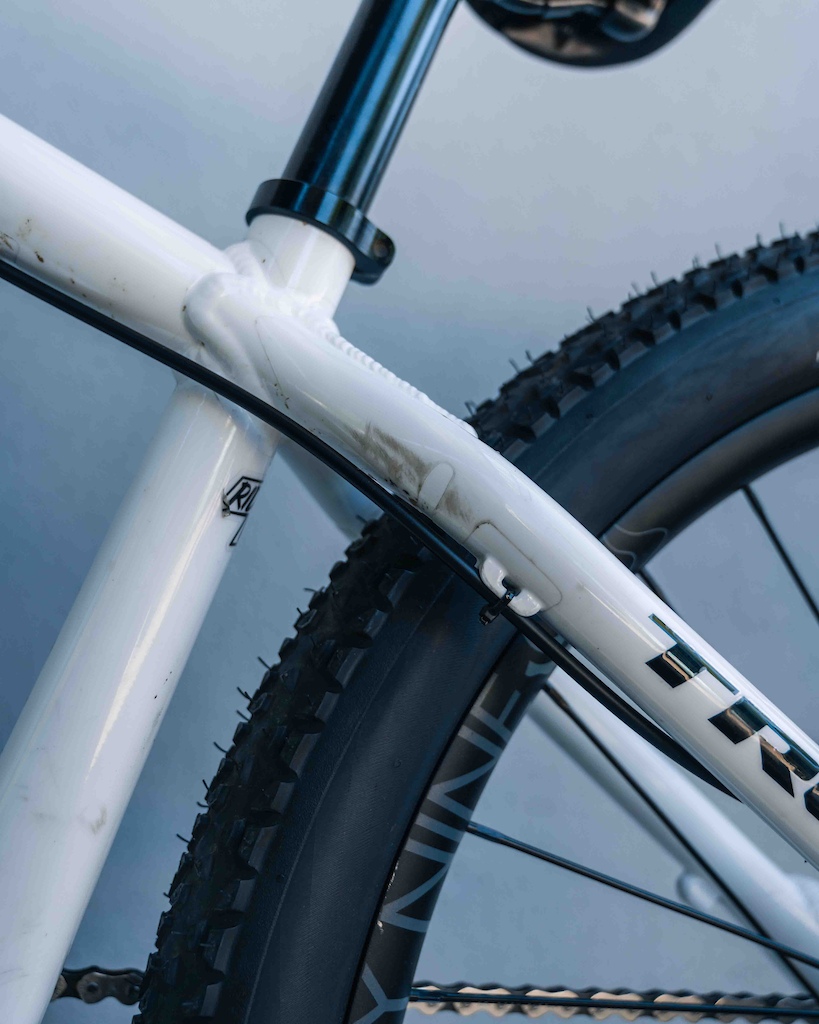
A replacement piece is a new piece of protection film that replaces an old damaged or worn-out protection piece. Damage can come from several causes, such as crashes, bike racks, shuttle rub, heel rub, travel troubles, and storage mishaps. Tears, scapes, scratches, and abrasions can damage the film and leave the naked frame vulnerable to future incidents. To combat these vulnerabilities, you can replace the damaged piece of your Tailored Protection™ kit with a new identical one, restoring complete protection to your frame or fork.
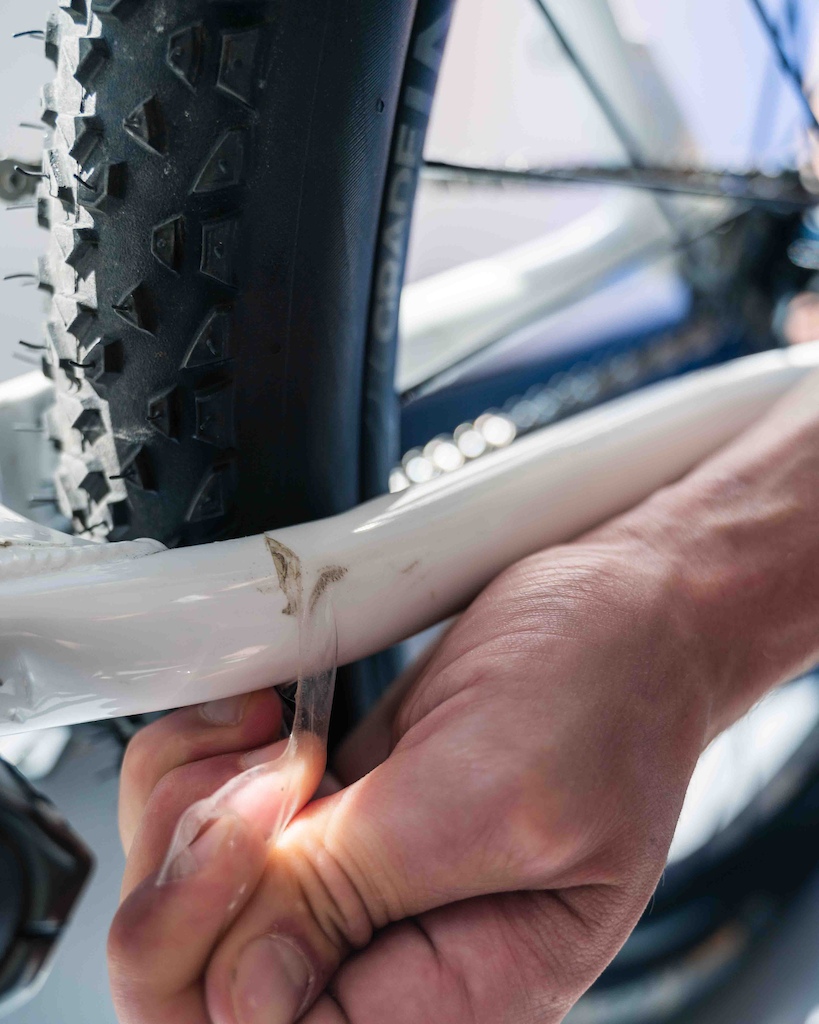
Use Gentle Heat Before Removing. Take Your Time Removing the Piece.
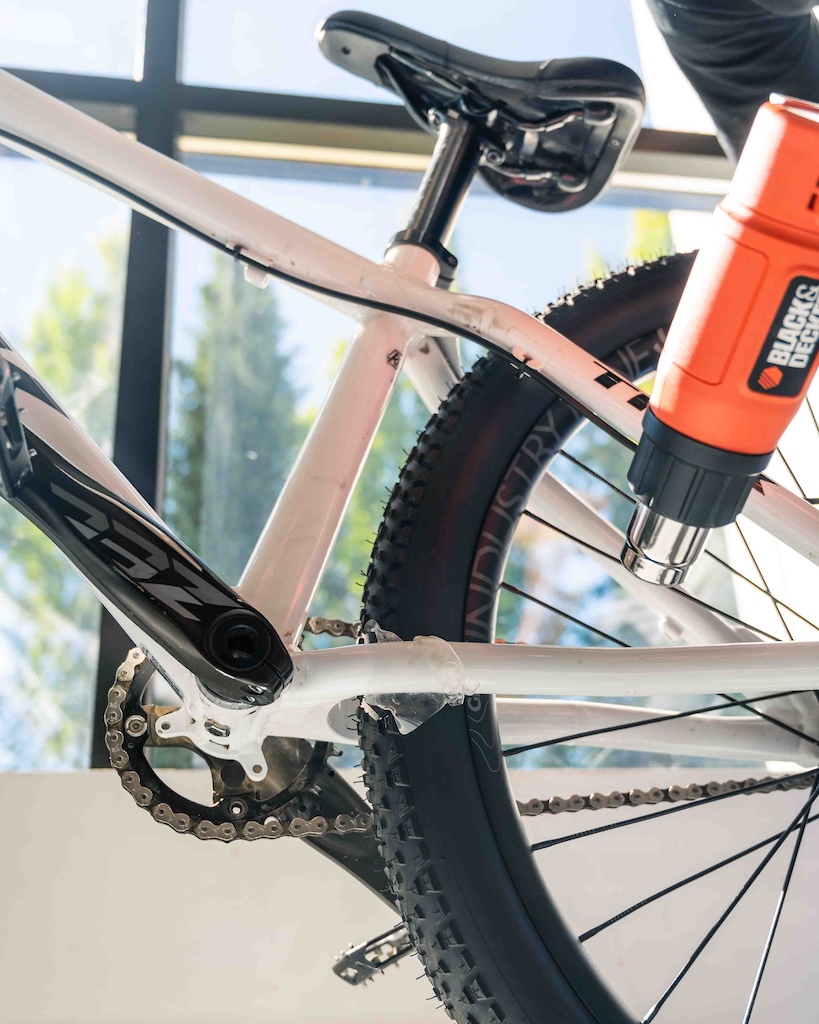
How Do I Remove A Piece Of My RideWrap Kit?
The process is simple but requires a bit of finesse. We’ve put together a how-to
page on our site with a video and some tips to guide you through it.
Minimal Faff. Maximal Efficiency.
Our new website feature cross references your previous orders and each protection kit's layout to supply you with the options for the exact pieces you want.
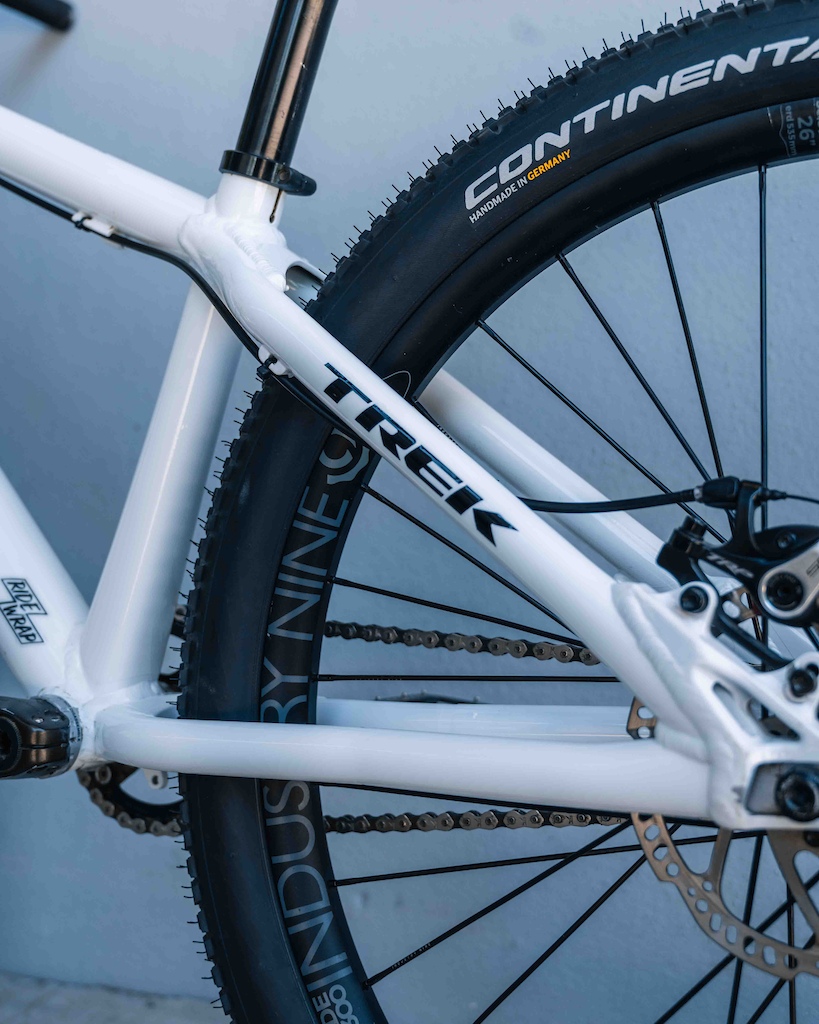

Replacement Pieces Installed. Bike Frame Is Protected, And Factory Finish Is Restored
How Does it work?
1. Go to RideWrap.com and log into your RideWrap account.
2. Click Products> Tool and Repair> Replacement Pieces.
3. Select from the products you have previously purchased.
4. Cross-reference the diagram and your bicycle for which piece number you want.
5. Select piece numbers.
6. Fill out the reason for the replacement.
7. Place your order.
8. Fill out billing and shipping information.
9. Kick back and relax. Replacement pieces are on their way.
10. Install the replacement piece/s.
11. Get back to the trails/jumps/paths/roads.
12. RIDE MORE. WORRY LESS.
Author Info:
Must Read This Week
Sign Up for the Pinkbike Newsletter - All the Biggest, Most Interesting Stories in your Inbox
PB Newsletter Signup
7029 Peist
The downtube is definitely a heavy-wear area. While a typical protection kit does stand up, for those shuttling and putting extra stress in the area we have two products specific for complimentary protection in the area:
Shuttle Armor
Extra Thick Downtube - 16 mils
WTF is all this complication for, its a $2 piece of 3M tape?
As well, our customer service team reviews each of them and has the opportunity to further subsidize the cost by way of refund, without the customer having to email in and ask for it... for many install issues we just do it.
If you got the bike and the paint hadn't had time to cure properly and it was wrapped this is also a possibility. The wrap seals it and there's no way for it to offgas so it never cures.
I've seen this happen with Plastidipping/Clear Bra's on some VERY expensive cars. These were applied professionally by auto chops over a brand new car right from the factory that hadn't had time to properly cure.
Anyway, I'd suggest peeling flat to the frame, never at a 90⁰ angle.
100% correct on peeling technique.
We even put it to the test.. gave our top installer a pair of scissors and a newbie a Tailored Protection kit.
https://www.youtube.com/watch?v=as5jcZsDYsE
Probably won’t use this anymore for ease of having sections precut since it’s only 8mil thick and if you’re not afraid to take time to cut sections on your own to fit, the material is the same as 3M scotchguard pro series matte clear 8 mil protection film for cars. (Non-pro series is only 6 mil) If you add cost of your time, then it doesn’t make sense not to just buy it precut from RideWrap or others. However, I would rather do it myself next time to have the saved backing material to immediately make another if I scratch/nick it throughout the season. Had my bike been gloss paint, I normally use:
www.amazon.com/Trimbrite-BodyGuard-Clear-Smooth-Protection/dp/B000HNFCHQ?th=1
Regardless of using the matte RideWrap, I still use this stuff on the insides of the rear triangle regardless. Nobody sees that area anyway and that’s where most of the debris takes it’s toll from the back tire. I think it’s 10-12 mil, so you really have to warm it up and take your time for a bubble free application.
Our RideWrap film (yes we make our own, not just 3M), is a true 9mil product and outperforms the automotive films. Take a peak at some details that we released at the beginning of this year:
https://www.pinkbike.com/news/ridewrap-announces-new-bike-specific-protection-film.html
As well for any readers, we have done some comparison testing of pre-cut vs. self-cut by pitting our best installer against a complete newbie. Check it out here:
https://www.youtube.com/watch?v=as5jcZsDYsE
Ride Wrap Tailored Frame Tape
I wrap all my bikes with Miles Wide Ever Clear Frame Tape. There might be better options out there, but I've found this to be my preferred option. For about 45 bucks I can wrap 95% of my frame over around 6 hours. The most frustrating part is cutting everything to size and dealing with annoying shapes and angles.
I would try Ride Wrap frame protection but the biggest thing that always held me back is the soultion and getting it just right and applying it perfectly with a squeegee. It seems like such a complicated task for a newbie, and for half the price I can get similar protection with a much simpler process of installation. I could be wrong about the difficulty of installing ride wrap but I don't want to spend $100+ to find out.
So why not combine the two? Tailored frame tape that works perfectly with your frame that's super easy to install. I still see two problems though. If you miss align the strip on your frame and try to peel it off, you might loose all of the stick. And the problem of dealing with abnoxious angles and shapes still might arise. I'm just thinking out loud, but if Ride Wrap could pull this off at an affordable price, I would love to try it out.
Being able to make the piece temporarily non-adhesive with water, get it roughly in the right place and then slither it around until it's perfectly placed is ideal for my cack-handed installation technique (then you just squeegee the liquid out from under the piece, it sticks and you're done).
Seems easy enough, I'll probably just stick with tape cause it's cheaper and easier for me. But to each their own.
- By 'Frame Tape', it looks like the Miles Wide Ever Clear product is just protection film cut into a strip. We offer sheets of protection film on our site under the moniker 'Film by the Foot'. Riders can cut and apply as they see fit.
- Our Tailored Protection is what you are looking for... pre-cut to your bike so you dont have to measure and cut the annoying shapes and angles.
- It sounds like you just 'dry apply' the frame tape. You can do this with RideWrap protection film and if you had a strip of it you could apply it just the same.
However, as some have pointed out, this is not the optimal method to apply Frame Tape or our protection kits. The wet apply allows you to align the tightly nested pieces correctly, and if you are not happy you can peel it back and try again. It also (in general) removes the finger print issue with dry applying any clear film.
@rrolly - if you are having difficulties, feel free to reach out to our team for support. In my experience, trying out different spray solution mixtures (more soap, less soap) is the trick to finding your sweet spot. If you are finding bubbles get 'trapped' to soon, slow the adhesive by adding a bit of soap to the mix.
- A general comment about self cut vs pre-cut... we put it to the test between a newbie and our pro installer. Also you get to watch Yoann run around being Yoann.
https://www.pinkbike.com/news/ridewrap-announces-new-bike-specific-protection-film.html
The concept behind a second bottle is effectively a 'wash'. So you can run a soap-heavy mix to align and squeegee the larger, flat surfaces, and then when you get to the edges, you can 'wash' the heavy soap mix from the film which will increase the tack at the edges. Isopropyl alcohol in that mix goes further into 'speeding up' the adhesive, however it is very aggressive and can cause issues.
I would say this is an advanced method for install.
When we designed our new film (release beginning of 2022), alot of time was spent on the adhesive. The goal is to balance the tack for install, but in the end, the spray solution is the key to changing how your install will go. Our team did a video on this very subject.
https://www.youtube.com/watch?v=dLDfVOv4fP0
5-10 min later I will return to that other piece, the edges will have dried up (speeding up adhesion) and I just press them down gently with my microfiber.
You can also mimic 'time' with heat.. So you can use a hair dryer to gently warm that edge, which evaporates the fluid and speeds up the adhesion.
There are definetely a few techniques to use, just about finding the one that jives best for you.
Try 3M tape. Super cheap.
https://www.pinkbike.com/news/ridewrap-announces-new-bike-specific-protection-film.html
https://www.youtube.com/watch?v=as5jcZsDYsE